This post may contain affiliate links. Read our disclosure policy here.
These homemade marshmallows with no corn syrup have the same texture, taste, and perform like the classic marshmallow you love but are made with wholesome ingredients like honey, powdered gelatin, and vanilla extract.
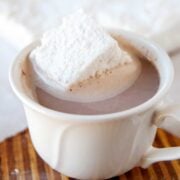
This recipe yields marshmallows that are bouncy, light, and perfect for topping over a cup of hot cocoa or toasted and sandwiched in between graham crackers and chocolate!

Jump to:
Ingredients
Here’s a list of everything you need for these fluffy marshmallows:
- water: to dissolve the gelatin.
- powdered gelatin: gelatin is an essential ingredient for marshmallows. I like using this brand.
- honey: the lighter the color, the better, so the marshmallows won’t be an odd shade of yellow. You can also use maple syrup.
- vanilla extract and salt: for flavor.
- arrowroot starch: for dusting the finished marshmallows and it prevents them from sticking together. If you aren’t doing paleo, you can use powdered sugar for dusting as well.
I don’t use raw honey for this because it’s a lot more expensive and when you boil the honey the “raw” ness goes away. So for me, it’s not worth the extra expense.
Want more delicious treats and desserts that are made with better ingredients? Check out my Clean Treats Cookbook, it has everything from chocolate cake to no-bake recipes, ice cream, and an incredible Blueberry Oat Bread.
Clean Treats Cookbook
Healthy and wholesome dessert recipes you’ll want to eat made with clean ingredients you already have on hand.
Grab your copy today!

Does it Matter Which Gelatin I Use?
Gelatin is what makes marshmallows set and hold together. I like to use pure beef gelatin that I can measure out myself but if the packets of Knox gelatin are what’s easily available, use those.
Knox gelatin is sold in bulk and in packet form. The packets are easy to find at the grocery store. Each packet of Knox gelatin has about a tablespoon, but to be safe, I would measure out 3 tablespoons.
Is this Marshmallow Recipe Paleo?
These marshmallows are a paleo-approved treat. They are made with honey instead of corn syrup and there’s no cornstarch in sight.
If you’re not eating paleo but came to this recipe for its corn-free ingredients, you can substitute the arrowroot starch with powdered sugar.

How to Make Marshmallows without Corn Syrup
Before we start you will need a square baking pan, parchment paper, a stand mixer, a saucepan, and a candy thermometer to make this recipe go smooth.
There are quite a few steps to make homemade marshmallows, but overall the recipe is easy, and below I provide step-by-step directions so your batch will turn out perfectly.

- Prep
Grease an 8×8 inch pan and line it with parchment paper in both directions, leaving about an inch as handles to lift out the marshmallows.
Dust the parchment paper with arrowroot starch. - Soften the gelatin
In the bowl of a stand mixer, combine the gelatin with ½ cup of water. - Make the syrup
Combine the remaining ½ cup with honey, vanilla, and salt in a medium saucepan over medium-high heat. Bring the mixture to a boil. - Take its temperature
Once boiling, place a candy thermometer in the saucepan and continue to boil the mixture until it reaches 240F (the softball stage). Immediately remove the saucepan from the heat. - Time to make marshmallow cream
Insert the whisk attachment to the mixer and slowly whisk the softened gelatin as you pour in the honey mixture. Turn the mixer to high and continue beating until the honey and gelatin become thick like marshmallow cream. - Grab the parchment-lined baking dish
Turn off the mixer and pour the marshmallow cream into the parchment-lined pan. Smooth the top and add another light dusting of arrowroot starch over the marshmallows. - Smooth it out
Cut an 8-inch square piece of parchment paper and place it over the marshmallows, gently pressing it over the top to smooth them out. - Be patient
Allow the marshmallows to “set” for 4-6 hours. They’re ready to slice once the texture is bouncy. - Let’s see how they turned out
Lift the big marshmallow square out of the pan and onto the counter. Using a sharp knife slice it into 16 squares.
These marshmallows should be light, spongy, bouncy and a delicious treat to enjoy by themselves or topped over something chocolatey and delicious.

Can I make Homemade Marshmallows with a Stand Mixer?
You can make this homemade marshmallow using a stand mixer but you will need to make sure to use a large, deep bowl to combine the gelatin and honey mixture.
It will also take about 15 minutes to make the cream and I recommend having someone pour in the hot honey mixture while you hold the bowl and whip the ingredients with the hand mixer.
Big Marshmallows
If you want colossal marshmallows like the ones found in the grocery store just slice them 6 x 6 for 12 squares or 4 x 4 for 8 large squares. While they may not be round, these homemade marshmallows are much tastier and since we’re making them, we get to decide how big we want them.

Tips for This Easy Marshmallow Recipe
Here are a few helpful tips to keep in mind as you make this recipe for perfect, bouncy marshmallows:
Make sure the honey mixture is 240F
You don’t want it to be any hotter or cooler when you pour it into the gelatin.
Don’t overmix
Once the honey and gelatin mixtures look like marshmallow cream, stop mixing.
How to Store Marshmallows
Homemade marshmallows are best consumed within 3 days. Keep them in an airtight container at room temperature and don’t refrigerate.
How to Serve Homemade Marshmallows
Homemade marshmallows can be used in all the ways we use store-bought marshmallows. The flavor and melting quality is a serious upgrade.
You can toast them over a fire, make s’mores and rice crispy treats, or fold them into brownie batter and cookie dough.
If you do want to use them for cookies and brownies, I recommend cubing them into small pieces so it’s easier to fold into the dough.
Homemade Marshmallows – No Corn Syrup Recipe
Ingredients
- 1 cup filtered water, divided
- 3 tablespoons powdered gelatin*
- 1 cup light-colored honey*
- 1 teaspoon vanilla extract
- ¼ teaspoon salt
- Arrowroot starch to coat the outsides of the marshmallows*
Instructions
- Grease an 8×8 inch pan and line it with parchment paper in both directions, leaving about an inch as handles to lift out the marshmallows.
- Dust the parchment paper with arrowroot starch.
- In the bowl of a stand mixer, combine the gelatin with ½ cup of water.
- Combine the remaining ½ cup of water with honey, vanilla, and salt in a medium saucepan over medium-high heat. Bring the mixture to a boil.
- Once boiling, place a candy thermometer in the saucepan and continue to boil the mixture until it reaches 240F (the softball stage). Immediately remove the saucepan from the heat.
- Insert the whisk attachment in the mixer and turn on medium speed while you pour the honey mixture into the gelatin.
- Turn the mixer to high and continue beating until the honey and gelatin become thick like marshmallow cream.
- Turn off the mixer and pour the marshmallow cream into the parchment-lined pan. Smooth the top and add another light dusting of arrowroot starch over the marshmallows.
- Cut a piece of an 8-inch square of parchment paper and place it over the marshmallows, gently pressing it over the top to smooth them out.
- Allow the marshmallows to “set” for 4-6 hours. They’re ready to slice once the texture is bouncy.
- Lift the big marshmallow square out of the pan and onto the counter. Using a sharp knife slice it into 16 squares.
Notes
- Plain Knox gelatin will work too.
- I don’t use raw honey for this because it’s a lot more expensive and when you boil the honey the “raw” ness goes away. So for me, it’s not worth the extra expense.
- If you are not on a GAPS diet, Paleo lifestyle, or don’t have arrowroot, you can use conventional powdered sugar for dusting.
- storage note: If you cover these the moisture will remain in the marshmallow and they won’t completely dry out. don’t cover them with plastic wrap. I leave mine out on the counter, uncovered, until they are gone.
- how to package these to “gift”: I recommend lining a small box with parchment paper and placing marshmallows in the box, not in a bag.


Allyson says
Hi! Thank you so much for this recipe! Is there a low FODMAP substitute for the honey? Could I use coconut sugar instead? Thanks in advance!
Laura Fuentes says
Unfortunately, you can’t swap out the honey for coconut sugar with this recipe.
Ann says
I LOVE these!
Curious though…mine are difficult to cut without them condensing a bit. Could it be I am over whipping in the mixer?
Also, I tried toasting these, but they melt before they toast…
Laura Fuentes says
Hi Ann! I’m thrilled you enjoyed these. unlike store-bought marshmallows, they do tend to “melt” when they get close to the heat. While they won’t get “toasted” when trying to make smores, they’ll get melty and essentially that’s all you need.
Diana says
Can I use maple syrup instead?
Laura Fuentes says
Yes, absolutely.
Mama Turner says
Laura,
These marshmallows were so easy to make and everyone I gave them to loved them.
I wanted to ask you have you ever made them chocolate? I like to experiment with recipes and thought that might be good. I loved your recipes and video about how to make the marshmallows. I have a new website to look for recipes, yours.
Have a great 2017!
Laura Fuentes says
I have not tried making them chocolate but I might add that to the test list! Thanks for the suggestion!
Leah says
I wonder if I could use brown rice syrup instead of honey? Has anyone tried this?
Laura Fuentes says
yes you can, but check boiling point as it differs than honey. It’s similar to corn syrup.
Elle says
Hi..do we need to cool down the syrup before mix with the gelatiin?
Or we just can whip just right after reach 240 F..
Laura Fuentes says
It goes in hot. If it takes a minute to get to the mixer and everything together, that should not be a problem. Hope this works out well for you.
Kasey says
Hello. I was wondering if I could use a sugar syrup, or agave nectar instead of honey. For one I already go through large amounts of honey in my house, for another, my oldest son doesn’t like the slight honey taste the marshmallows have. I think they’re great, and my other son, and all three of my nephews love them, but the whole reason I want to make marshmallows is that my oldest son can’t have corn syrup or soy anything. so it’s kind of missing the point I was going for for him to not care for them.
Thanks for sharing, this is so far the easiest of the marshmallow recipe’s I have found yet, and sets up the most reliably.
Laura Fuentes says
I have not tried it with either sugar syrup or agave nectar. They have different boiling points so the method would be different. Sorry!
Britney says
I made these last night and had my first marshmallow this morning. Turned out AMAZING! My honey/water mixture took about 15 minutes to reach 240 degrees. I used knox gelatin. Each packet is a little less than a full tablespoon, so I used 3.5 packets. Probably should have just used all four because now I have half a packet of gelatin I know I’ll never use. My kitchenaid stand mixer is still in a box somewhere (just moved) so I ran to Target and bought a handheld mixer. Took about 15 minutes of mixing to achieve marshmallow fluff consistency. That was probably the hardest part, was just waiting that long and holding the mixer for that long. Scraped all the marshmallow fluff into a baking dish lined with parchment paper and arrowroot starch and placed it above the fridge overnight. Finished up around 10 pm and cut into it at 8 am and it was perfect. Tasted just like a commercial marshmallow except for a slight honey taste- which is of course to be expected because they’re made of honey. Also made egg free/gluten free/dairy free/grain free graham crackers last night, which will go perfectly with these marshmallows tonight when I make s’mores with the family. Will definitely make these again.
Laura Fuentes says
I’m so glad they were a success for you Britney!
Victoria says
Can these be toasted over a fire?
Laura Fuentes says
yes! enjoy.
Brenda K McCombs says
Curious if you know of a replacement for cornstarch or arrowroot to keep the marshmallows from being so sticky. My son has Crohn’s and can’t have any starch.
Thank you.
Laura Fuentes says
unfortunately no, I’m sorry!
Anita says
Has anyone tried with maple syrup? I’m not a huge honey fan and much prefer the taste of maple
Thanks!
teresa says
Hi, Laura. We are vegetarians. Anyway we can make this recipe with alternative jelling ingredient such as agar agar ? Can you suggest changes in the recipe instructions with the ingredient change ? My kids would just love, love, love it if mommy can actually produce marshmallows to enjoy, like their non-vegetarian peers. 😀
Also, I don’t have a mixer stand, just a hand held blender. Will that work ?
Thx !
Laura Fuentes says
Teresa, I have not been able to successfully make this recipe (with the same texture) with agar agar. Sorry! If you don’t have a stand mixer, a big bowl with a hand mixer will work.
Tamara says
I made these and found the honey taste overpowering. Thinking next time I will try the traditional sugar marshmallow recipe. However, now feel familiar with the concept and will look forward to the next batch of marshmallows,
Linda says
Hi, I was wondering if these marshmallows can be used to make marshmallow fondant? TIA
Linda
Laura Fuentes says
I have never tried it Linda.
Melissa says
These are a NO BRAINER!!!! I was so worried to branch out & not use a corn syrup recipe against all opinions I gathered while using this as a science project with my kids who are BEGGING me for marshmallows. My 5 year old made them! Yayayayayaa & Thankyou!
Laura Fuentes says
We can now say that this recipe is 5-yo proofed! wooho!!! so happy everyone loved them 😉
Colin says
Amazing recipe! I used a mixture of half raw honey, amber coconut nectar, date paste and half Swerve + a bit more water to liquefy the granules and it all came out PERFECT! Thank you so much for this recipe.
Kerry says
very similar to my recipe from my 1978 Australian Women’s Weekly New Cookbook, a houseful of adults here thought they were great but a bit too sweet (I actually agreed but it’s my job to frown and then give them the wooden spoon). I fear there is very little I can do about this (the marshmallow, not the food critics). Even though we are honey lovers I wonder if there is some kind of syrup comparatively lower in sweetness, does anyone know? I toasted some dessicated coconut and used this to toss them in, they might sweat less, but possibly unsuitable for toasting over the fire. Also an idea from Australia: this is the way we do s’mores: instead of graham crackers we use a fairly plain flat cookie (wheatmeal) that’s coated on one side with chocolate If you can get it (you can get un-chocolated too). Ours is called “Chocolate Wheaten”. Thanks for the great recipe.
Ashley says
Try using coconut sugar simple syrup or coconut nectar. Mine turned out great with those sweeteners.
Audry says
So, I tried the recipe. We even some how had a candy thermometer. in the drawer!?!? I felt very uncomfortable heating to “soft ball”, and i feel as though trying to balance the thermometer and mixing the mixture that I may have burned it just a tad. But I did my very best and I believe that I hit 233 degrees. I turned off the heat and followed the directions, apart from using arrowroot, as I do not feel that this fits into my diet at all. Used parchment paper and lots of coconut oil. These came out so flipping amazing. I feel like the recipe is a cheat, of sorts, and I wish that it incorporated marshmallow root as well. But for the ingredients used, Wow. Just wow. Great work. Perfect recipe and results. Thank you kindly.
Only con- Honey tastes a tad burned. Not sure if this is normal, or because I did burn it slightly, or due to the quality of my honey or other mistakes.
Zeina says
So I’ve actually made these probably about 10 times now (in the past few weeks). They were such a huge hit, everyone has been asking for them. I have experimented with different methods and some batches came out better than others. I can say though that I get the best results when I actually let the honey mixture boil till 250 instead of 240. And, the mixture does need to mix for a while. A couple of times, I didn’t let it mix long enough, despite looking like marshmallow cream and they came out more sticky and less firm. I’m thinking maybe for those that came out sticky, and melted in the bags, probably didn’t whip long enough. Definitely needs at least 10 mins.
Lori says
Just came across this recipe and marshmallows turned out perfectly!
The honey flavor was a bit over -powering though. Wondering if you have ever tried to make them with a coconut sugar or maple syrup? Or perhaps just less honey?
Thanks so much.
Ashley Kennedy says
I’ve made them with coconut sugar and they are great!!
Ashley Kennedy says
I’ve made them with coconut sugar they were great!
Ashley Kennedy says
I was so excited to find this recipe. I did burn the first batch of honey but the second time was a success! However, I’m not a huge fan of honey. I do love coconut sugar and make my own simple syrup. So I decided to give the marshmallows a try with my coconut sugar syrup. They have a light brown color and a bit more of a brown sugar flavor but they are delicious! Melted some down and made a batch of rice crispies with gluten free rice cereal topped with cacao nibs. Huge hit!
Ann says
Do you know if this would work to frost cupcakes? I’m working on a s’mores cupcake for my son’s birthday so this would be perfect on a chocolate cupcake. Should I pipe directly onto the cupcake before cooling, or cool them and then melt down like a normal marshmallow and try to make a fluff out of it??
I did make these already as directed and they came out wonderful. I was planning to try the frosting but somehow I ran out of marshmallows before I got round to it. 🙂 I’m hoping someone else has tried this.
Laura Fuentes says
Ann, I haven’t tried this to frost cupcakes -yet! I imagine using a knife to spread it over the cupcake tops (or you could pipe it) when it’s warm. they will solidify overtime, it’s not fluff. Here is my fluff recipe. Enjoy!
Person says
Hi
Thank you for including video with the recipe!! VERY VERY helpful :).
Question – do u know what difference will be if use dark vs light honey? I have a lot of dark honey in the house currently….
Thanks!!! 🙂
Heather says
Hi!
This looks like an excellent recipe for those of us with corn-allergies! I’m curious, has anyone tried freezing these?
-Heather
Laura Fuentes says
I have not tried freezing them. If you do, please let me know how they hold up. Enjoy!
Sarah says
I have frozen these and it works if you are careful. I placed them on parchment paper cut to the size of a Ziploc freezer bag. I put the marshmallows on the paper, put another sheet on top to add a 2nd layer, then put a piece on top of the whole pile. Once they were in the bag, I made sure to press all the air out of the bag and then put it directly in the freezer. They were great a couple of months later when my daughter needed marshmallows for camp again.
The 1st time I made honey marshmallows (not this recipe but a similar one), I didn’t know not to close them in a container. I went away for a week and left the remaining ones in a closed container on the counter at home. When I got home I planned to ‘melt’ the leftovers to make rice krispie squares. Alas, they were green – gone moldy while I was on vacation due to absorbing all the moisture in the air/container. Oops!
Lauren B says
I just wanted to thank you SO much for this recipe. I have a corn allergy (worst allergy EVER) and haven’t had a marshmallow in a year and a half. Most “corn-free” recipes still use corn starch or powdered sugar! I’m going camping this weekend and was NOT about to go without s’mores. Mine came out very fluffy and light, but I’ll admit I used the wrong paddle (I used the regular paddle for the mixer instead of the whisk). I may not have let it whip quite long enough, but I also haven’t been able to stop eating them. SO GOOD!
I realized that this was an adaptation of Alton Brown’s marshmallow recipe, and I’ve also noticed he has a method for making “mini” marshmallows by using a piping bag to pipe strips of the marshmallow mixture, then cutting the strip into smaller pieces once set. I’m totally going to try that next time!
Looking forward to roasting them 🙂
Laura Fuentes says
I am SO HAPPY you were able to enjoy some marshmallows!! well deserved. 🙂
Anna says
Q: If I am using the marshmallows for rice krispies treat, can I use them right away without cooling? Or to get the consistency/flavor I need to cool them and then melt them again?
Laura Fuentes says
you can use them without cooling. I usually refrigerate the mixture to speed up the process once mixed with rice cereal. enjoy!
Anne says
This was surprisingly wonderful recipe. I had expected for it to taste more like honey but it didn’t. I hadn’t waited for the marshmallows to cool and put them right into a rice crispies recipe. Before they cooled and formed, they tasted great! But after cooling, they became soggy. I wonder if some of the moisture would be gone if I had let the marshmallow mixture cool and then melt for the addition of the other ingredients. All in all, it still tastes good considering that I haven’t been able to have any in years.
Thanks for the recipe!
Betsy S. says
Hi Laura!
Curious as to the role of salt in this recipe? is it used to balance out the sweetness of the recipe?
And sorry if this has already been asked, but what is the storage time like on these?
Cheers,
Betsy.
Laura Fuentes says
the salt is used as a stabilizer to the chemical reaction to make the marshmallows. They are fresh marshmallows so the shelf life is relatively short. Maybe a week.
JuliaLyn says
A million heart felt thank you’s!!!! For an aip mom and kids who are reactive to corn and soy these are very much a dream come true!!! Not sure if the kids are more giddy…..or me;)?! Just made some aip shortbread cookies and melted down some 100% cacao with maple syrup and a bit of honey to go with both the marshmallow and cookies as a drizzle. I do not know the last time I truly felt like I had a safe indulgence! For this tonight as I prepare for the holidays, I am truly thankful!!!!
Laura Fuentes says
You are very welcome Julia! those shortbread cookies sound amazing!
Addison says
You are truly awsome
cristina says
Can i use arrowroot powder instead of coconut
Laura Fuentes says
yes, dusting it with coconut or arrowroot powder seals the “stickiness” Enjoy!
Shanti Graceth says
Thank you for your quick response! I’m looking forward to actually partaking in s’mores tonight instead of just watching:)
Shanti Grace says
Should these set in or out of the fridge?
Laura Fuentes says
they set on the counter at room temperature. then i refrigerate.
Sky says
I’m currently making this recipe and I’m on the mixing step but the mixture isn’t getting white or creamy. Can you help me as soon as you can please!! Don’t know what to do or if I can save it.
Laura Fuentes says
Please watch the video. it shows you step by step visually how everything should look.
Sky says
Thank you very much. I watched the video and it was very imformative. I really like your blog, it is very useful. Thanks for the help! I think I’ll try the recipe again after a while of doing other recipes. Thanks again!
Jewels says
Mine didn’t either. I followed the recipe and watched the video (including using the thermometer) so I’m not sure why mine didn’t turn out right. I used the Knox gelatin though. That’s all my local store had so I used it since it said I could in the notes. I’ll probably look for the gelatin used in this recipe and try a different brand of honey and try making them again soon to see if that works. My son is allergic to corn syrup and has been wanting marshmallows all summer so I’m glad I found the recipe but I’m sad it didn’t work for me.
Laura Fuentes says
Jewels, I’m sorry it didn’t “set” for you! can you re-purpose the marshmallows to make rice Krispy treat like bars?
Kirsten says
Thank you for this recipe! I followed your instructions and made them with coconut like in the video, and everything turned out prefectly.
Laura Fuentes says
Success!
Jennifer says
Can the marshmallow mixture be used in rice crispy treats? I need a corn free option for a class treat. Or can it be melted down?
Laura Fuentes says
I’ve never tried it. Sorry!
Jacque says
Can you toast these over a camp fire? We went camping this weekend with a friend whose son can’t have food dye and avoids corn (syrup/starch/etc.) so no s’mores for little man. I am now on a mission for him to get to toast some marshmallows!
Apparently “good” marshmallows are only available “seasonally” at Trader Joe’s, which means winter – ppfftt, SUMMER is the SEASON for marshmallows! LOL
Laura Fuentes says
yes, but not right on the flame. I just put them close and slide onto our graham cracker.
Jacque says
Thanks! We’ll be trying them out this week I think 🙂
Matt says
These were great!! I made a batch recently and they have been a big hit! So nice to have a guilt-free treat to offer my son after dinner.
Initially, mine came out of the fridge extremely sticky. I finally figured out that the key was more arrowroot starch (I used tapioca) to coat the sides. Also, after cutting into squares, I found that it was helpful to roll each square in some excess starch to keep them from re-sticking! Plus it makes them feel just like store bought marshmallows!
Can’t wait to make them again!
Ashlee says
Have you tried roasting these? I make another corn syrup free marshmallow that turns out great, they just don’t roast well. Thanks!
Laura Fuentes says
Yes I have, and they work well.. although they are a bit stickier than the store bought kind.
Ashlee says
Great! Thank you so much for getting back to me so quickly!
Heather says
These look so good! I definitely want to try. My son will be in heaven if I can master these. I like your website too! I’m new to blogging, and love finding blogs like yours! ~Heather
Laura Fuentes says
thanks Heather! I hope your son loves them!
Amanda says
Made these last night! They are wonderful. I was wondering, do you think they would work if I added less gelatin to make it more marshmallow fluff like to make rice crispies? They started firming up pretty quickly this time. I would really like to do that for my son.
Laura Fuentes says
Amanda, I’ve got you covered. I developed this recipe for fluff. And, if you want my no corn syrup rice crispy recipe this is it. You can use regular puff rice.
Danielle says
Is it possible to use the marshmallow recipe after beating it immediately for the rice krispies instead of the fluff?
Laura Fuentes says
Yes, after the “marshmallow” mixture is done, you can pour it over your rice cereal and mix instead of pouring it into the pan. Mix quickly, transfer to a pan and cool. It might take a little longer to solidify, but it works! enjoy.
Linda S says
Made these this morning for after school hot cocoa. With these cold temps they will want to warm up. These turned out great. Won’t go back to ones with corn syrup again! Thanks.
Laura Fuentes says
Awesome Linda!!
Mayi Z says
They were perfect! So yummy and not runny at all. I covered them in cornstarch and stored them in a plastic container… no condensation at all. Again thanks so much!
Mayi Z says
I just made these tonight, mostly out of curiosity… oh boy… they’re amazing! They taste just like the real thing, considering that they are mainly made out of gelatin, honey and water. I modified the recipe slightly to make the marshmallows sturdier (added more gelatin). So far so good, I’ll check back when I cut them. Thanks so much!
Laura Fuentes says
Please let me know how much you guys enjoyed them!
Suz says
these sound awesome – how long do they last (assuming they aren’t all eaten almost immediately)?
Laura Fuentes says
about a week at room temperature.
Meg says
We are vegetarian. Do you recommend a substitute for gelatin powder? Will agar agar work?
Laura Fuentes says
Meg, I have not tried it with agar agar. I’m sorry.
angelica says
Same as above: anyone try agar agar in place of gelatin? If I do, I’ll post results. Thanks.
Leah says
Did you ever end up trying it with agar agar? That’s what I’d like to use too
Laura Fuentes says
I have not. Sorry!
Keri says
I am having the same problem as January. I used a thermometer and whipped for ten minutes, until it was thick like marshmallow cream. They are a great texture, feel just like store bought marshmallows except the they’re slimy. I had no problem dusting them with powdered sugar. I actually put a bunch in a bowl with a lid a ms shook them to cover them completely and they came out awesome. I put them in zip lock baggies to give to my kids teachers with some cocoa mix and coffee and after sitting in the bag, the sides of the bags are covered in marshmallow slime.
Laura Fuentes says
did you cover them with plastic wrap? that will hold the condensation “in”. I Just let them sit out uncovered. The honey ones are a bit “stickier” but i wouldn’t say gooey. these marshmallows are homemade, and of course, aren’t like the ones at the store.
January says
I made these last night and while they taste pretty good – like a normal marshmallow – they won’t dry out. They are set, very firm & cut nicely, but they are wet and powdered sugar won’t stick :(. I can’t package them because you can see the moisture from the bag. Any thing you can think of that I did wrong? Like I said, they are set. I waited for the 6 hours. I’ve made them before using a corn syrup recipe and this didn’t happen but I’ve only done it once so I’m not sure if I did something wrong.
Laura Fuentes says
January,
If the marshmallows are too soft, soggy, wet or lack volume after setting for 4-5 hours or so, your sugar syrup may not have gotten hot enough OR you did not whip them long enough. Whipping times will vary quite a bit depending on your beaters. Did you use a thermometer? However you can not whip an undercooked sugar syrup enough to make it fluffy. “fluffing” is essential for it to “set”. these are not dry marshmallows like at the store.. they are a tad more moist.. but not wet.
TIffany C says
OMGEE this looks awesome! What DON’T you know how to make, huh???
Krista says
Can I use a hand mixer instead of stand mixer?
Laura Fuentes says
Krista, for the hand mixer do it on high (start slow and progressively speed up) in a deep bowl. it takes a while…. so make sure you have someone to relieve the hand. I’m not kidding when I say that it will take about 10 minutes… so watch the clock. 🙂