
This post will show you how to sear chicken so it comes out juicy, flavorful, and perfectly browned on both sides.
As you read, you’ll find helpful tips and step-by-step directions to make delicious pan-seared chicken fast!
Jump to:
What Does it Mean to Sear Chicken
To sear chicken means to cook it at a high temperature in a hot pan until a golden-brown crust forms on the surface. This is done with oil so the chicken’s surface ‘sears’ evenly without sticking.
Searing gives chicken and other meats that mouthwatering look and flavor in addition to sealing all the juices inside the meat.
You can cook chicken in this fashion for a quick entreé or before baking it in the oven if you want your chicken to have a crisp crust on the outside.
What Does Searing Do to Chicken?
Searing the surface of the chicken helps lock in moisture in the meat; which in turn, it holds the flavors inside. Searing your chicken first can be helpful if you are baking the chicken after; since it gives the chicken breast a ‘crust,’ and the meat won’t dry out.
How to Make the Best Seared Chicken
Below I take you step-by-step on how to make the best seared chicken. It’s a very simple process, that when followed as shown in the step-by-step below, your chicken will turn out just right.
- Pat the chicken dry with paper towels and season both sides with salt, pepper, and your choice of seasonings.
- In a large cast-iron or stainless-steel skillet, heat a tablespoon of oil over medium-high heat. Generally, you’ll need about a tablespoon or two of oil per pound of chicken.
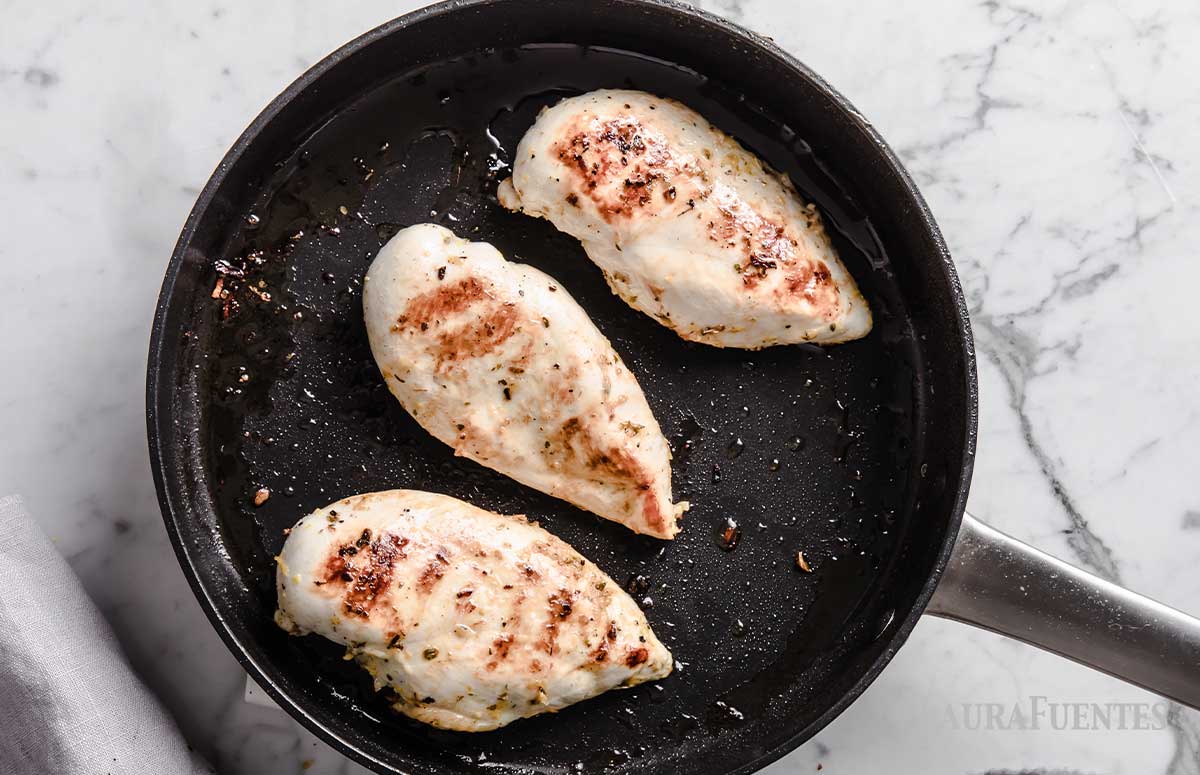
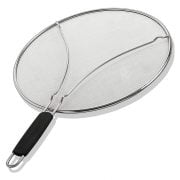
- Once the oil is HOT, carefully place the chicken flat into the skillet, , making sure to not move it once in place, working in batches if needed. Do not seal your pan with a lid, since this will cause your chicken to steam and not sear. Use a splatter screen if needed.
- Cook on one side for 6 minutes or until the surface is golden brown and slightly crisp. The chicken should easily release from the pan.
- Using a spatula, flip the chicken and cook for an additional 3 to 5 minutes or until the chicken reaches an internal temperature of 165F.
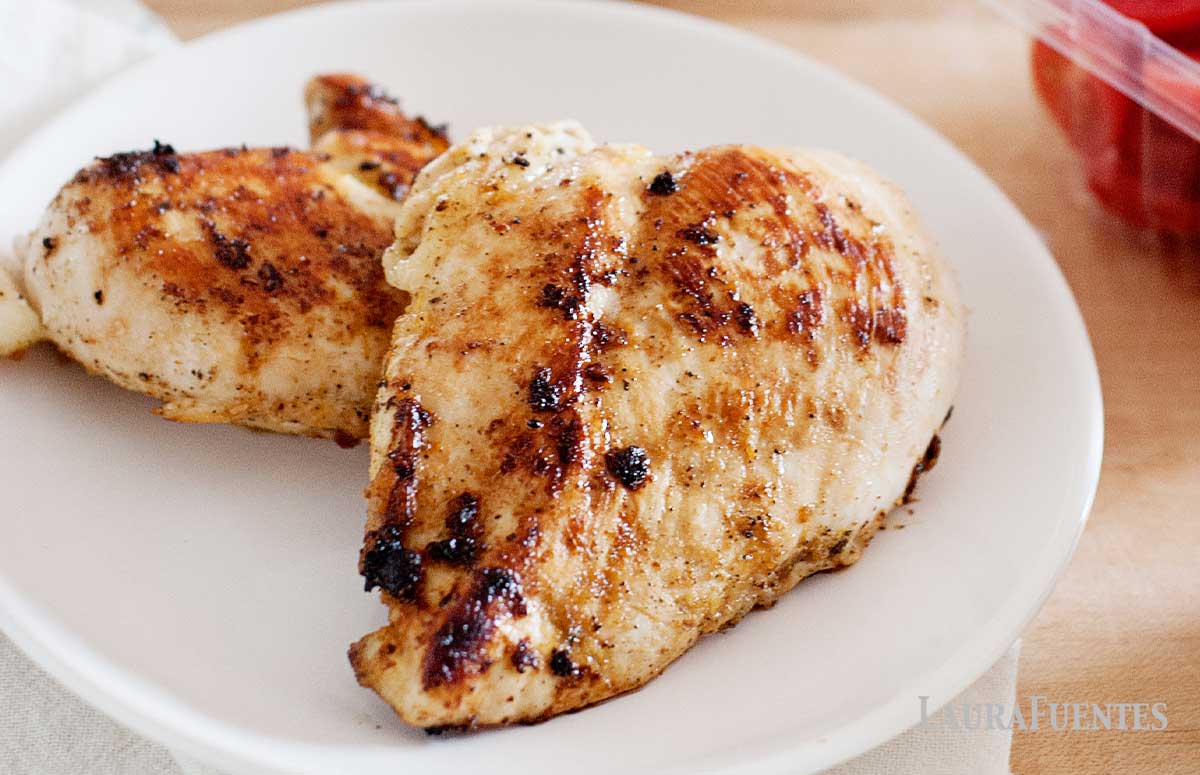
- Remove the chicken from the pan and let it rest 5 minutes before serving.
If chicken is your family’s favorite protein, and you find yourself cooking it every week, I’ve got a ton of delicious chicken recipes for you to try out in my latest ebook, Chicken. It’s What’s for Dinner.
You’ll find recipes for sheet pan meals, pasta, soups, power bowls, and everything in between, all of them made with chicken.
70+ Epic Chicken Recipes
If chicken is your go-to meal builder, you’re going to love the recipes inside this book!
From marinades, soups, slow cooker meals, one-pot wonders, sheet pan dinners, and more, the recipes inside are delicious and kid-approved.

Searing Chicken without Drying it Out
The best way to prevent the chicken from drying out is to cook chicken according to an internal temperature of 165F for white cuts and 175F for darker meat, which is easy to measure with a meat thermometer.
The second best way is for your chicken to be cut at an even thickness throughout. Butterflied chicken breasts or cuts of chicken with an even thickness, like chicken thighs, are best.
A butterflied chicken breast will cook evenly from end to end and cook much faster than a chicken breast since it’s half the thickness.
You can butterfly chicken breast quickly, and it’s worth the extra step because it makes juicy chicken that cooks fast.
How Long Does it Take to Sear Chicken?
For searing chicken breasts, the first side will need 5 to 6 minutes to sear, undisturbed on the pan, and an additional 3 to 5 minutes on the other side.
If you are cooking butterflied chicken breasts or boneless, skinless thighs, they won’t need as much time to cook. About 3-4 minutes on the first side and an additional 3 minutes on the other side.
Cooking times will always depend on the thickness of the meat you are cooking; which is why using the meat’s internal temperature as the gauge for doneness is always best. Internal temperature is checked once both sides are browned, and the juices run clear.
How to Know when Seared Chicken is Done
Seared chicken is done when the internal temperature reaches 165F for chicken breasts and 175F for thighs. Both surfaces should have an even, golden brown exterior.
If you are baking the chicken after searing, you don’t need to cook it as long, you’ll flip it once the chicken is easy to lift from the pan.
How to Keep Chicken from Sticking to the Pan
To keep the chicken from sticking to the pan, you’ll need to heat your pan first, then add the oil and heat it up. Once hot, place the chicken and do not move it from where it’s placed. You can test the heat by adding a few water droplets; if they sizzle- you’re ready to cook!
Raw meat will always “stick” so keeping the chicken in place is very important.
It also helps to make sure the pan is clean from a previous cooking batch. Any small food particles or residue will make the chicken stick to the pan.
Watch this video to see how to make perfectly seared chicken every time, see how to avoid the chicken getting “stuck” and more!
Best Pan for Searing Chicken
You want a pan that conducts and distributes heat evenly for searing chicken and other meats. I love my cast-iron skillet and stainless steel pan -even a skillet with high sides works great.
They are also oven-safe, so you can sear the chicken and then bake it in the same pan without dirtying extra dishes.
Coated, non-stick large pans work well, too; except that people tend to get a “false sense of security” with the non-stick, use too little oil, and the chicken ends up sticking when lifted too early.
When to Season Seared Chicken
For the sake of a good sear, I recommend seasoning the chicken with salt and additional spices. You’ll want to season the chicken cutlet with salt on both sides before adding it to the skillet. Any additional seasonings should be added to the second side only since that side will cook for less time and therefore, your spices won’t burn.
You can also use marinades such as my Lemon Chicken Marinade, but make sure to shake off any excess before adding it to the pan.
How to Sear Chicken

Ingredients
- 1 lb chicken breasts, boneless skinless
- Salt & pepper
- 2 teaspoons of your favorite seasoning blend
- 1 tablespoon olive oil
Instructions
- Place the chicken breasts onto a flat surface and pat dry with paper towels.
- Season both sides of the chicken with salt and pepper, and your choice of additional seasonings, if using, just on one side.
- In a large cast-iron or stainless steel pan, heat the oil over medium-high heat. Place the chicken pieces, salt-only side down, in the pan and cook undisturbed for 6 minutes or until the meat lifts easily from the pan and the surface is golden brown.
- Using a spatula, carefully flip the chicken and cook for an additional 3 to 5 minutes until the chicken reaches an internal temperature of 165F.
- Turn off the heat, remove the chicken from the pan onto a plate, and allow it to rest for 5 minutes before slicing or serving.
The recommendations below may include affiliate links.


Lupe says
Must share rating! I’ve got to say this is the best flavorful, juiciest, aromatic, chicken fajitas I’ve had! My Hispanic family enjoyed every bite of it! Only tweaks I did was seasoned the breast top only and salted the flat side, to avoid spices from burning. I added liquid smoke to my precut veggies & sautéed. RiQUIsiMO!
Laura Fuentes says
Thank you Lupe for sharing how much you enjoyed this recipe! Que alegria!
Alissa says
This was helpful, i just learned a lot and feel like I am ready to try searing chicken breasts for the first time.
Barbara says
SO much to lear about searing chicken correctly!
Melanie says
This post is so useful! I just pan-seared chicken breasts following this step-by-step and it was so simple. I always bake chicken in the oven, but this method is quick and the chicken breasts are juicy!! Thank you Laura!