This post may contain affiliate links. Read our disclosure policy here.
Use fresh or frozen cherries to make these fuss-free homemade hand pies in any shape you like!
Ingredients
The amounts for this easy Cherry Hand Pies recipe are at the end of the post, but first, let me walk you through the ingredients to learn why we are using them:
- Frozen cherries: if using fresh cherries, remove the pits.
- Sugar: for the filling, more to sprinkle on the top.
- Cornstarch: for thickening the filling.
- Lemon juice: adds an extra note of flavor.
- Butter: delicious taste and velvety consistency.
- Vanilla extract: makes everything tastier!
- Salt: enhance all the flavors.
- Refrigerated pie dough: you can use homemade dough too.
- Egg white: adds nice shiny tops.
- Water: to combine with the egg whites.
Of course, these can be filled with a simple strawberry jam as well, should your kids not like the tartness of cherries. Or you can try my Lemon Blueberry Hand Pies for another delicious homemade treat!
How to Make Cherry Hand Pies
These Cherry Hand Pies are cute, tasty, and easy to make; and the kids love to help cut out the heart shapes, fill them with the cherry filling, and crimping the edges! Here’s how to make these beauties:
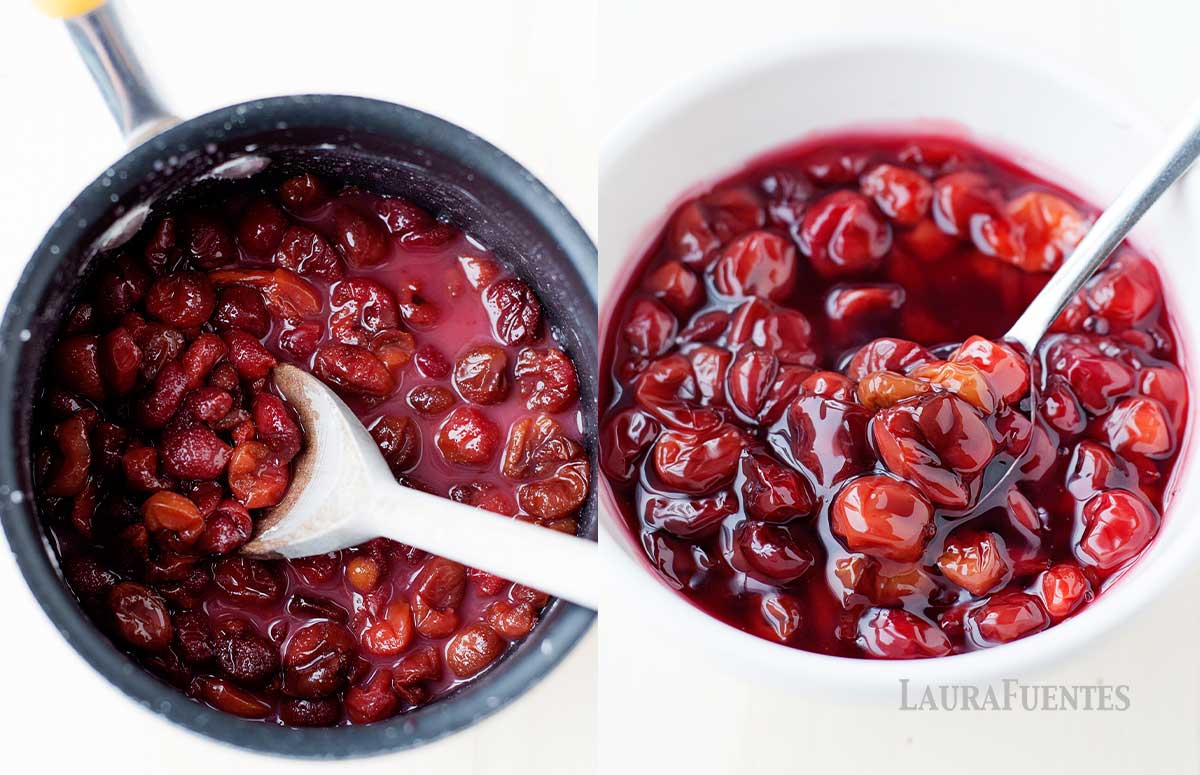
1. Make the filling
You start combining and cooking the filling in a saucepan, stirring frequently so it doesn’t stick. After 10 minutes of simmering, you’ll have a thick cherry filling with large pieces of cherries. Allow it to cool down while you continue with the next steps.
2. Prep the dough
For a pliable and easy-to-work-with dough, remove it from the fridge and let it sit on the countertop for about 10 minutes to come to room temperature.
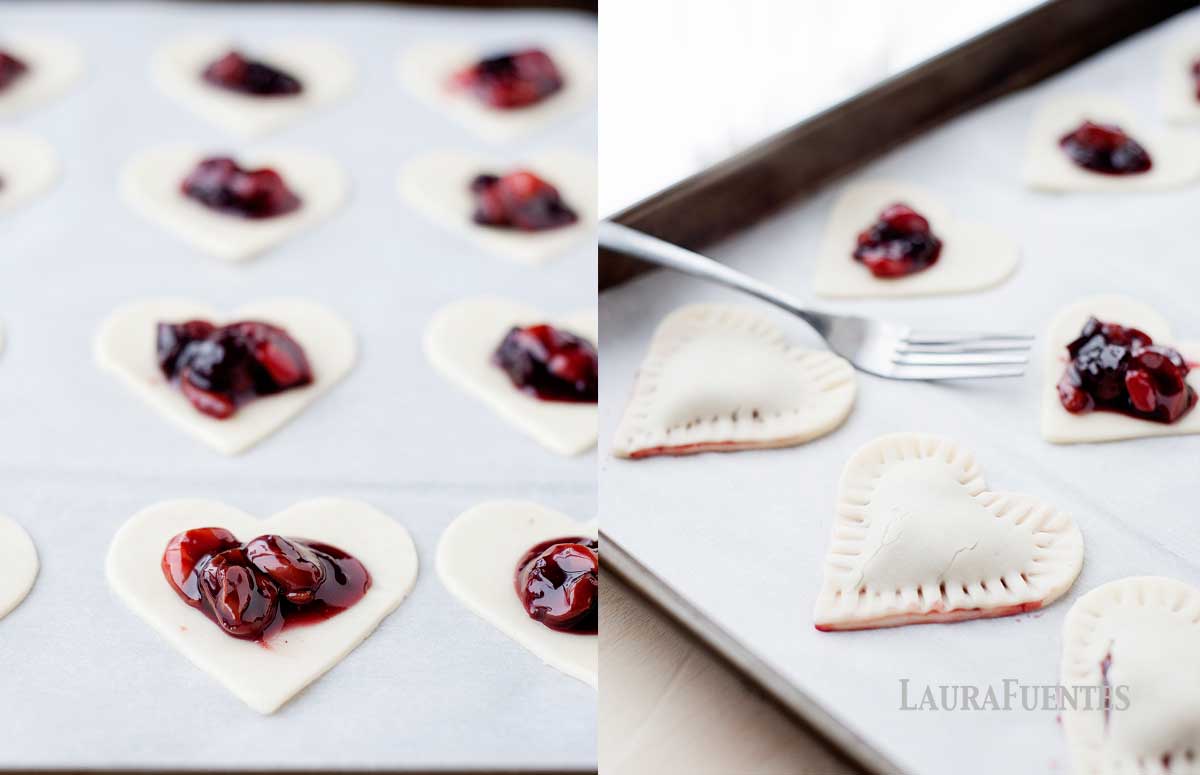
3. Cut the dough
You want to roll it out a little without sacrificing much of the thickness. Once done, you cut the dough into shapes. Make sure you end up with an even number.
4. Assemble the hand pies
Now, you spoon the filling in the middle of the dough shapes. Make sure to lo leave about ½-inch around the edges to seal the ends. Place the remaining pieces of dough on top and seal the hand pies with a fork.
5. Refrigerate
Thirty minutes in the fridge helps the pie dough to set and yield that nice golden texture we love.
6. Before baking!
Time to prep everything for baking. First, preheat the oven. Second, cut a small X-shaped slit on the top of each hand pie (so the steam can be released). Finally, brush each one with a mix of water and white egg, and sprinkle some sugar (for shiny tops).
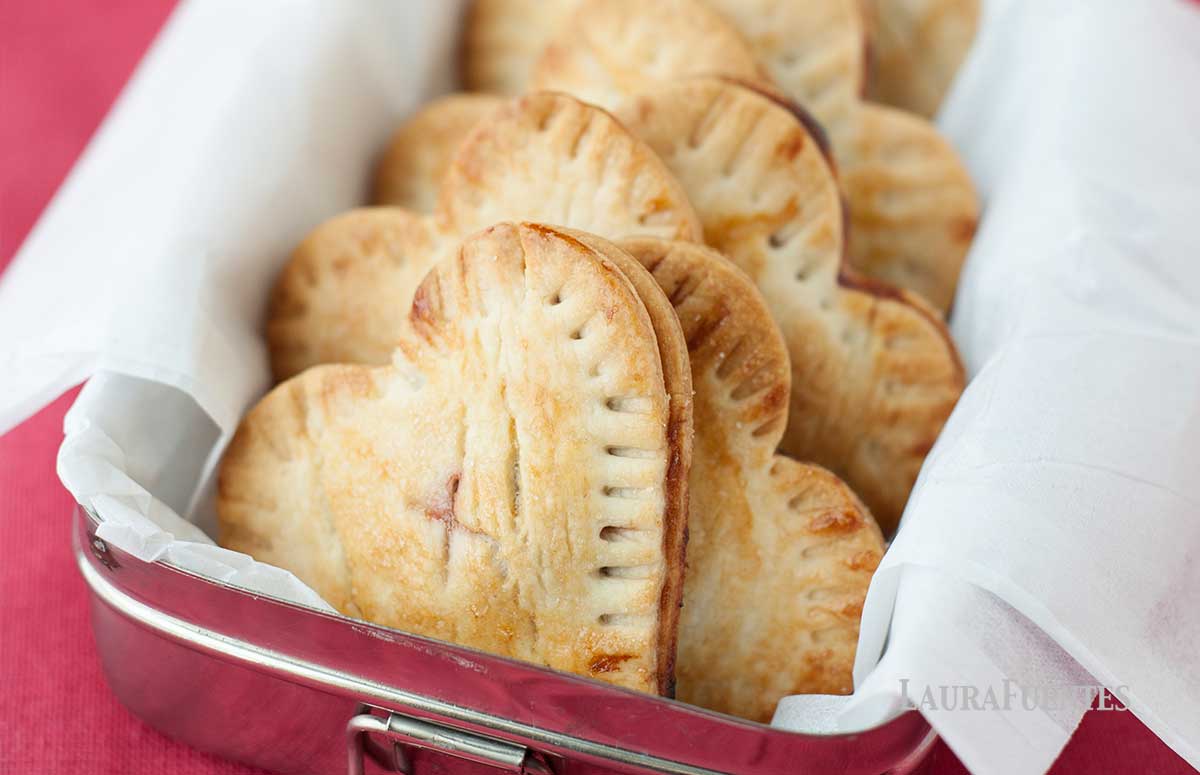
7. Now, bake!
Bake for 16 to 18 minutes, until the tops are golden. I know how tasty these cherry hand pies look, but wait for them to cool down completely before serving.
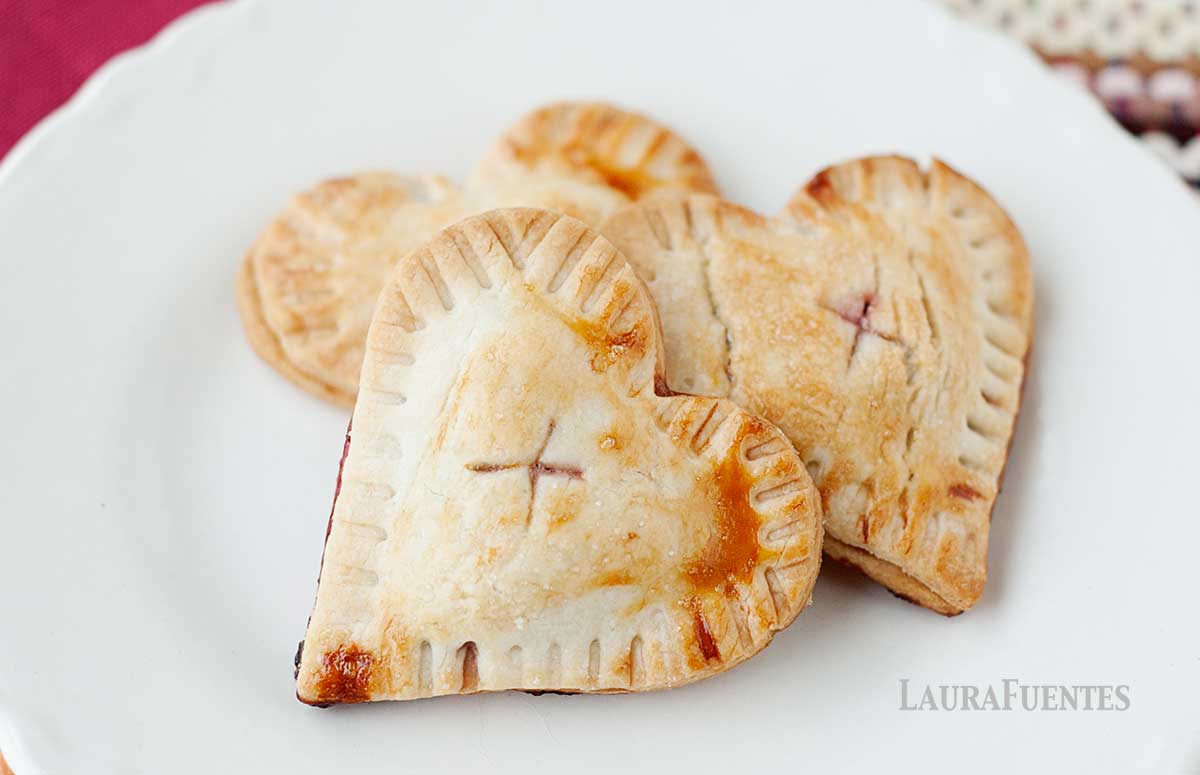
Making Heart-Shaped Hand Pies
By using a cookie cutter to cut the dough, you can make these pies into any shape you like. I made them into hearts for Valentine’s day, but you can use any shape you have on hand or even a round biscuit cutter! Once the cherry hand pies are baked, allow them to cool down. Otherwise, the pies could break down and lose their shape.
How to know when hand pies are done baking
Cherry hand pies take 16 to 18 minutes to be cooked in a 400F preheated oven. You know they are done when the tops are golden and some cherry juices bubble through the center.
How to Freeze Hand Pies
Baked hand pies can be stored in the fridge in an airtight container for up to 5 days. If you want to freeze cherry hand pies, you should freeze them unbaked in a zip bag for up to 2 months.
Can You Bake Frozen Hand Pies?
Yes! Take the cherry hand pies out of the freezer, and they will thaw while you preheat the oven. Place them on a baking sheet and follow the recipe’s baking instructions. You’ll have delicious hand pies!
Cherry Hand Pies (Beginner Friendly)

Ingredients
For the filling:
- 16 ounces frozen cherries (about 3 cups)
- ⅔ cup sugar
- 1 tablespoon cornstarch
- 1 tablespoon lemon juice
- 1 tablespoon butter
- 2 teaspoons vanilla extract
- ⅛ teaspoon salt
For the hand pies:
- 2 packages refrigerated pie dough
- 1 egg white
- 1 tablespoon water
- 2 tablespoons sugar
Instructions
Make the filling:
- Place the frozen cherries, sugar, cornstarch, lemon juice, butter, vanilla extract, and salt inside a medium saucepan over medium heat. Stir frequently until the mixture comes to a boil.
- Once boiling, reduce the heat and simmer for 10 minutes to thicken the mixture, stirring occasionally, until you have a thick cherry filling with large pieces of cherries.
- Remove it from the heat and let it cool down to room temperature.
Make the hand pies:
- Remove the refrigerated pie dough from the refrigerator and let it sit on the countertop for about 10 minutes to come to room temperature. This helps the dough become more pliable and easier to work with.
- Unroll the pie dough on a lightly floured surface. Roll it out a little, without sacrificing much of the thickness, to about ¼ inch. Then, with your favorite cookie cutter shapes, cut out the pie dough into as many shapes as you can. Make sure you end up with an even number.
- Place half of the cut pie dough shapes on the parchment. Spoon a few spoonfuls of cherry filling in the middle of the hand pies, leaving about ½-inch around the edges to seal the ends.
- Place a second piece of dough on top of the bottom, making sure to line it up around the edges. Use a fork to seal and crimp the edges all around the hand pies.
Chill:
- Refrigerate the hand pies for 30 minutes. This helps the fat in the pie dough set so that the hand pies have the right golden texture when baked.
Bake:
- Preheat oven to 400ºF (200ºC) with the top oven rack positioned in the middle of the oven.
- Remove the hand pies from the fridge and cut a small X-shaped slit on the top of each one. Whisk an eggwhite and the water in a small bowl and brush each cherry hand pie with the egg wash and sprinkle a little coarse sugar on top.
- Bake for 16 to 18 minutes, until the tops are golden and some of the cherry juices bubble through the center. Remove from the oven and let the hand pies cool down completely before serving.
Notes
- Fresh cherries: remove the pits from 3 cups of cherries. Follow the recipe as noted.
- Homemade dough: use your favorite pie dough recipe which yields enough dough to make a standard pie, with a top and bottom.


Cateraar Wassenaar says
Need to make these immediately! My mouth is watering!
Liz says
Thank you for the nice recipe. Have a wonderful day.