This post may contain affiliate links. Read our disclosure policy here.
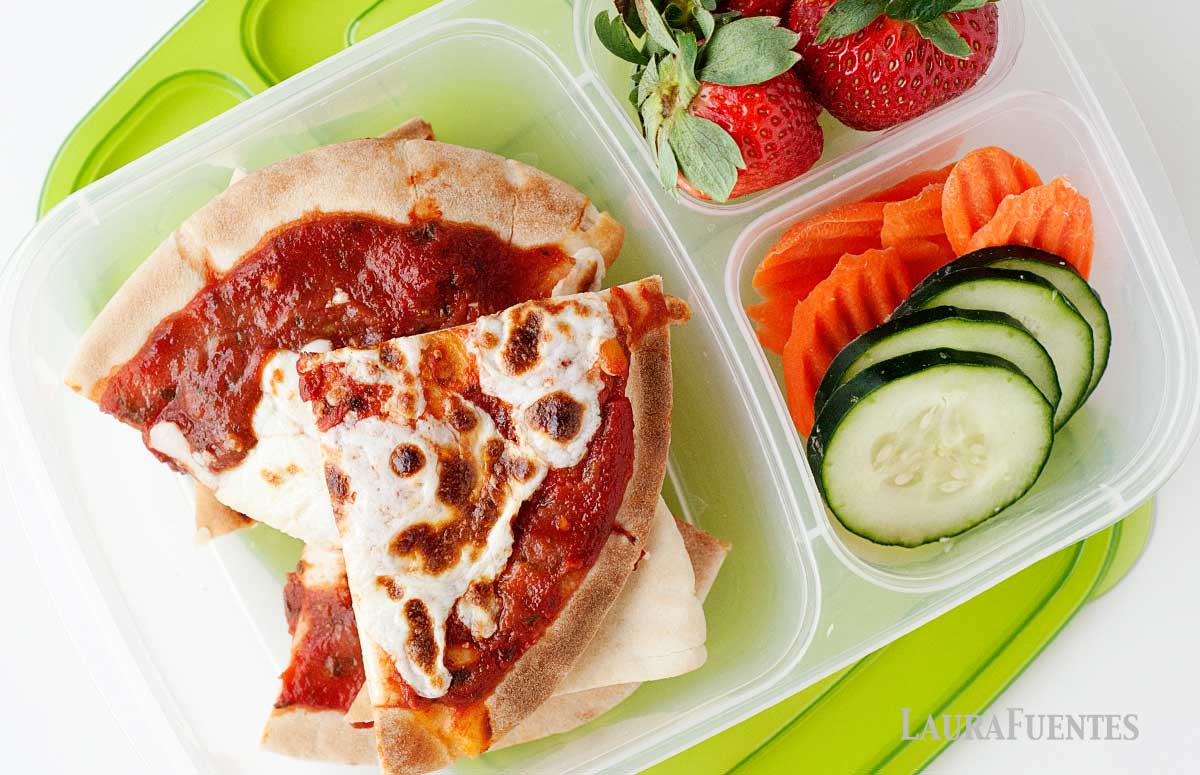
Need an easy and fun recipe to get dinner together in under 15 minutes? These easy pita pizzas are just what you’ve been looking for.
7 Minute Pita Pizzas
Dinner time is coming, and that what-do-we-eat moment of crisis has you staring at the kitchen, looking for an answer, while the delivery temptation is about to win. Not this time! This 7-minute Pita Pizza recipe solves dinner quickly and easily!
You only need pitas, pizza sauce, cheese, and your favorite toppings. They are super easy to assemble and leftovers taste amazing the next day. I typically make an entire pack of pitas into pizzas and toast them in the toaster oven the next day for lunch.
All the goodness of pizza in half the time. Healthier and more budget-friendly than buying pizza. A quick kid-friendly dinner that the little ones can help to make. Yep. This recipe is perfection!
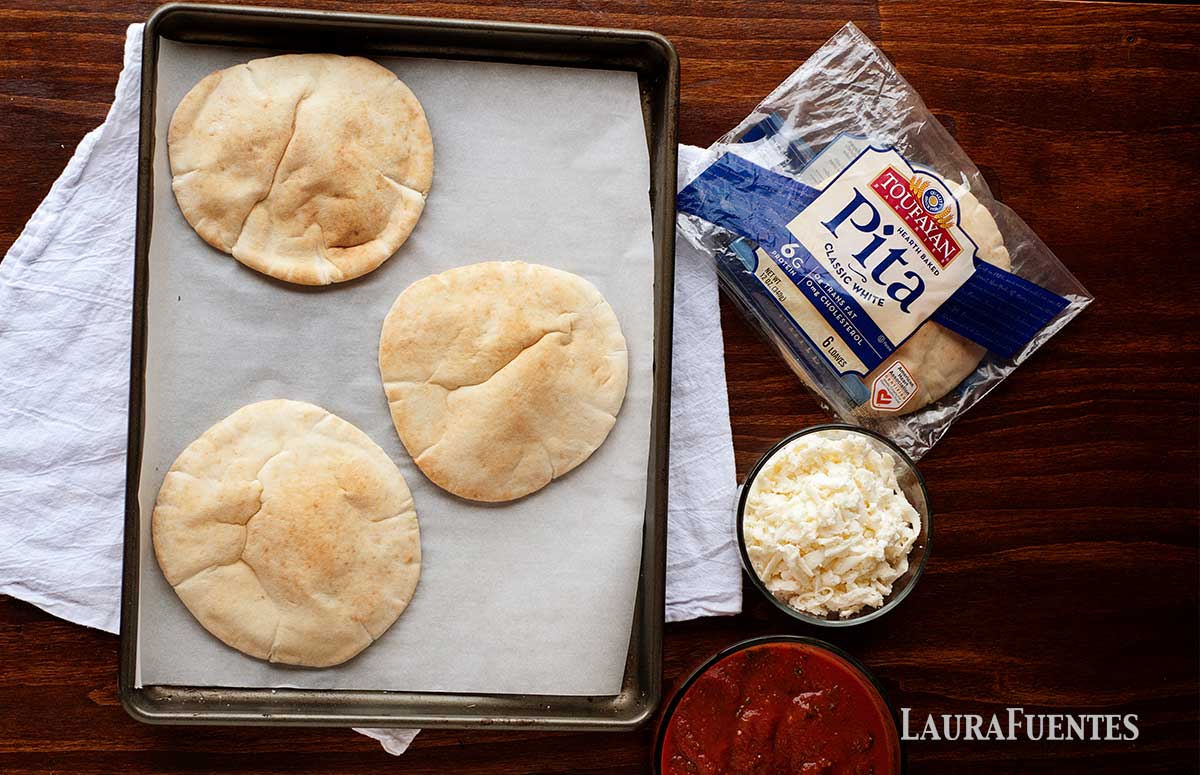
Ingredients
This super easy recipe is made with those staples you always have around. No pitas on hand? Swap them for flour tortillas and make tortilla pizzas! Here’s what you need for pita pizzas:
- Pitas: regular or whole-wheat.
- Pizza or marinara sauce: store-bought or homemade; use your favorite.
- Grated mozzarella: we want a delicious cheesy pizza, don’t we?
- Pizza toppings: your favorites! You’ll find a lot of ideas below.
How to Make Pita Pizzas
Making this dinner is a breeze and it’s ready in less than 10 minutes! It couldn’t be any faster. Check the steps:
- Prep the oven
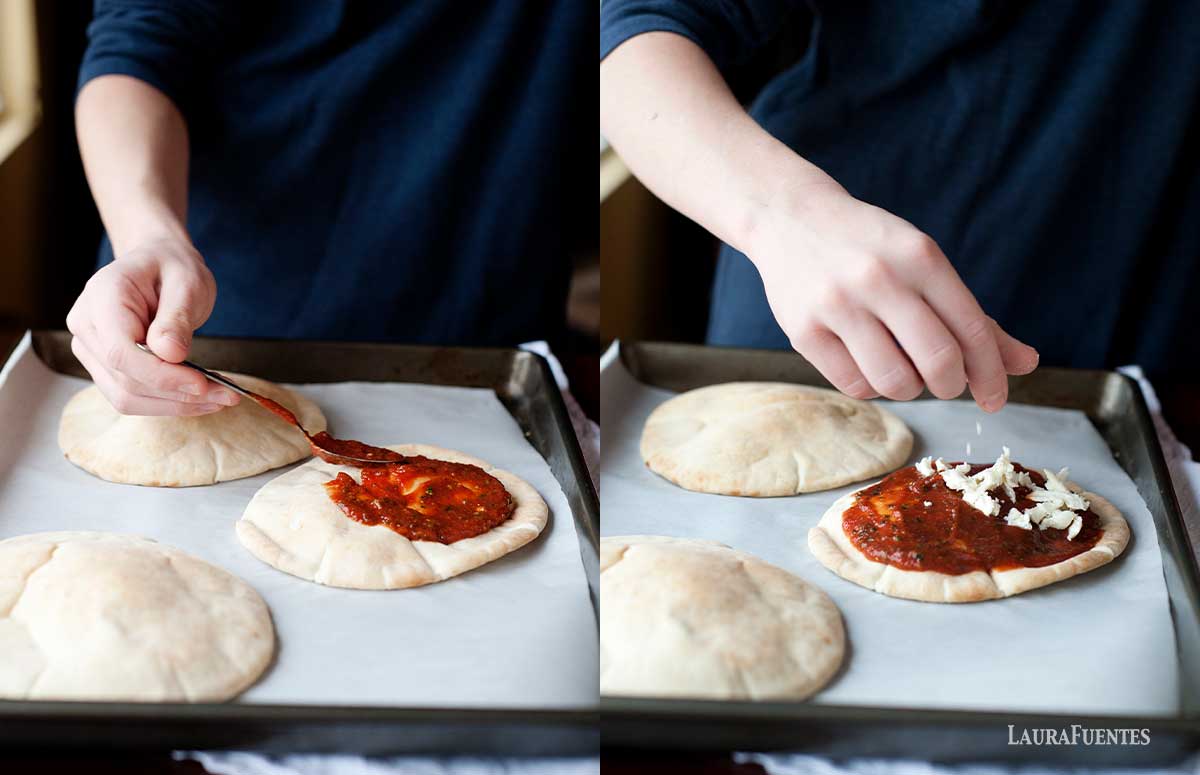
For baking 6 pitas at once in two pans, you position the top two oven racks towards the middle and lower of the oven and preheat to 400F. Then, you line two baking sheets with parchment paper. - Load up the pitas
Now, add about ¼ cup of sauce to each pita, distribute the toppings on top, and sprinkle the mozzarella cheese. - Bake
Bake the pita pizzas for 7 to 8 minutes, switching tray positions halfway through, or bake them one at a time, as you prefer. - Remove from the oven
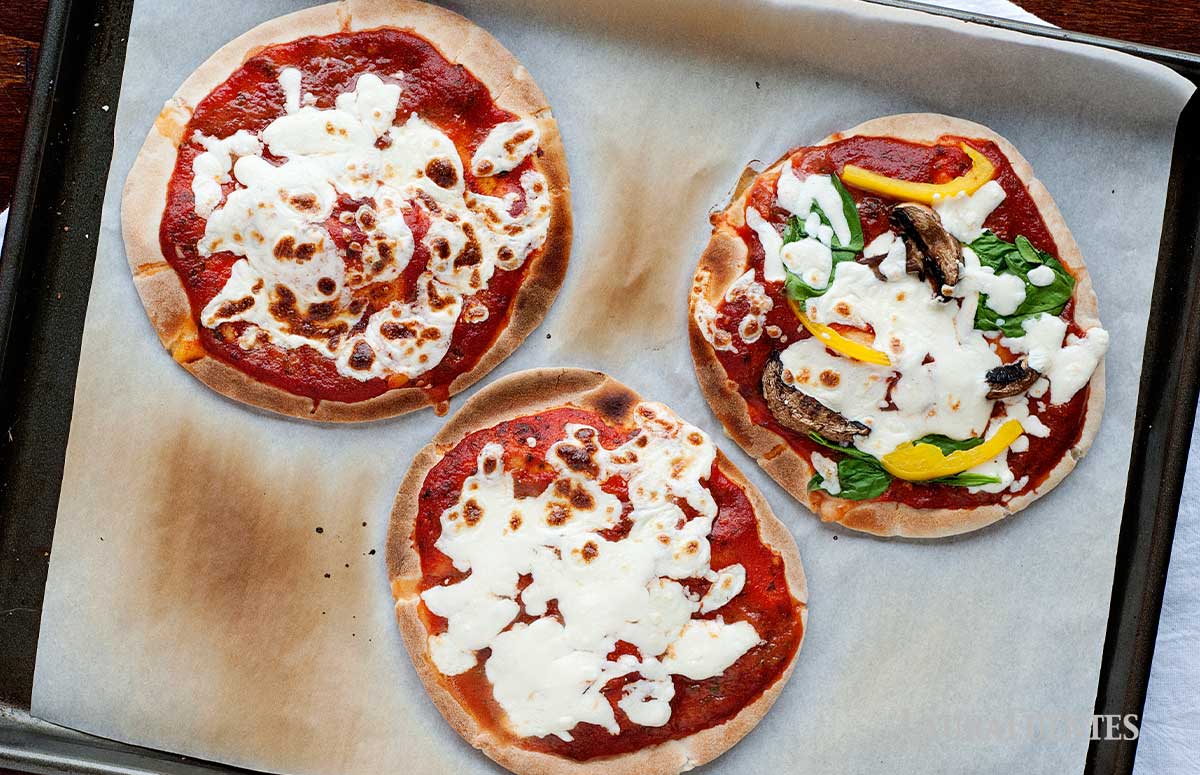
You’ll know the pizzas are ready to remove from the oven when the cheese is bubbly and golden on top.
Pita Pizza Oven Temperature
To bake these pita pizzas, set the oven to 400F. In 7 or 8 minutes, the pizzas will be warm enough, and the cheese will melt. Yummy!
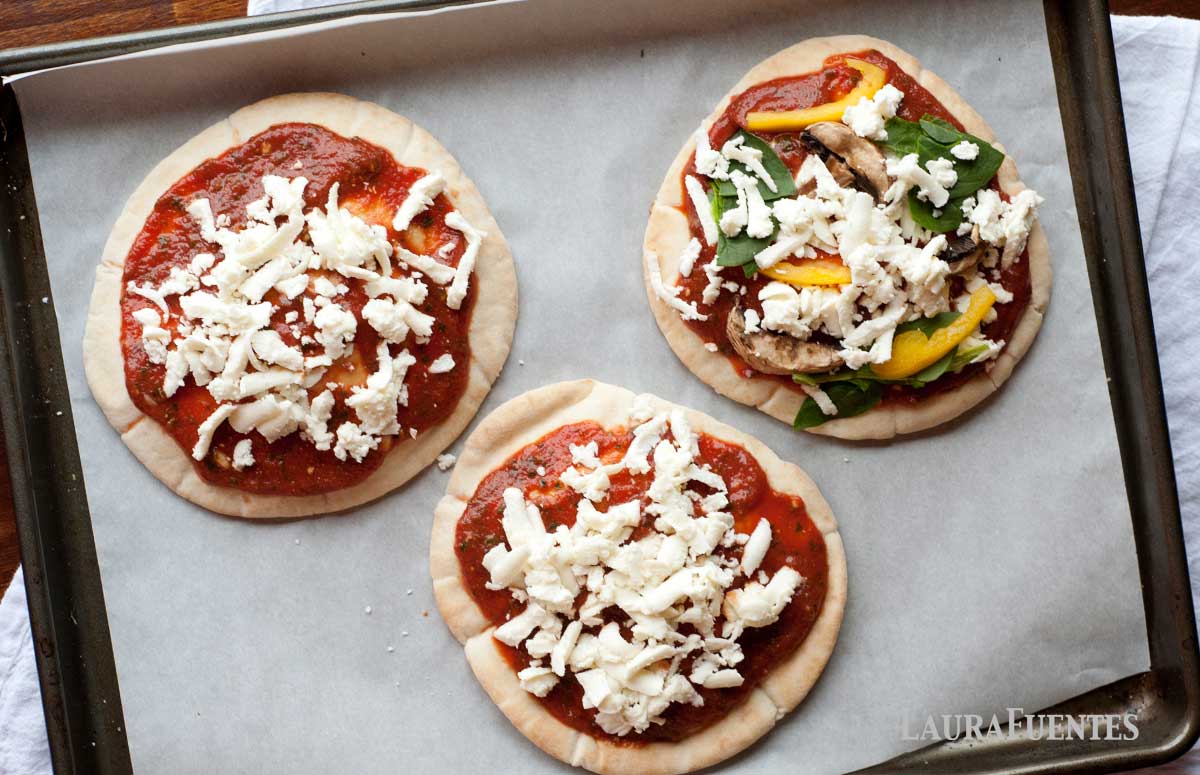
Pita Pizza Toppings
And now is when you make the most of leftovers and add them to your pita pizzas! Those last olives on the jar, that sad spinach that is not enough for a salad… leftovers will be happy to return to life as a pizza topping. Here are some delicious ideas:
- Olives
- Pepperoni
- Bacon bits
- Deli ham
- Sausage
- Spinach
- Chopped broccoli
- Tomatoes
- Artichoke hearts
- Mushrooms
- Onions
- Jalapeños
- Fresh basil
- Pesto sauce
- Diced pineapple
- Shredded chicken
- Bell pepper strips
Can You Freeze Pita Pizzas
Yes, these are freezable before baking. Make the pita pizzas and freeze them flat on a baking sheet. Once frozen, wrap them tightly with plastic wrap or transfer them to a zip bag and can stay in the freezer for up to 1 month. To enjoy, simply bake them according to the recipe, letting the pita pizzas thaw out while the oven preheats.
Easy Pita Pizzas (Kids can Make!)

Ingredients
- 6 Pitas
- 1 ½ cups pizza or marinara sauce
- 1 ½ cups grated mozzarella
- Pizza toppings
Instructions
Prep:
- Position the top two oven racks towards the middle and lower of the oven. This is so you can bake 6 pitas at once in two pans. Preheat the oven to 400F.
- Line two baking sheets with parchment paper.
Load up the pitas:
- Spread approximately ¼ cup pizza sauce on each pita. Distribute the toppings on top of the pitas and sprinkle the mozzarella cheese on top.
Bake:
- Bake the pita pizzas for 7 to 8 minutes, switching tray positions halfway through. You can also bake them one at a time, of course. Once the cheese is bubbly and golden on top, remove the baking sheets from the oven and serve.
Store:
- Leftover pita pizza can be stored in the fridge for up to 2 days in an airtight container or zip bag. It can be reheated in the oven at 350F for 5 minutes, in the toaster oven through a light-medium toast cycle, in the air fryer at 340F for 6 minutes, or in the microwave for 45 seconds (this is the least recommended method).


Emerie says
This pizza is so good! I really like the descriptions and step by step methods because cooking with kids can be stressful LOL!
Jennifer says
when you make extra pitas ahead of time, do you bake them then store? or only bake them prior to eating/packing? If the latter, how do you keep the cheese & toppings from falling off when you store them?
thanks!
Teresa says
Hi, Laura,
Here’s a side question — how did you defrost the gluten free dough in time ? I keep some from wholefoods in my freezer but find defrosting to be a problem at crunch time. Also, I have no idea how long is the dough good for when frozen. Do you know ?
Pita pizza sounds great. I will try it sometime, especially the pesto pizza from your picture in at the kid food fest. We found a really great dairy-free pesto at wholefoods that the kids really love. We’re vegetarians and I never feel comfortable using parmesan because it uses lots of animal rennet.
We have a similar super-easy pizza recipe. We use English muffins. My daughter had me follow a recipe she read about from one of her 3rd grade citywide tests passages. It uses one half of an English muffin, 1 layer of basil leaves, thin slices of ripe tomatoes, a few more basil leaves, and mozzarella cheese (we happened to have fresh ones on hand). Then bake in toaster oven at 375 at 12 min. It was so simple she could do it (monitored). Then, to my delight, I put two pieces together, like a sandwich, cheese to cheese, and she ate it all up during lunch at school.
Susan says
Hi! I was just wondering if the pitas get soggy from the pizza sauce by lunchtime? My oldest has sensory processing disorder and he can’t handle any type of soggy or mushy texture (think mashed potatoes, or cereal that has been sitting in milk for a while) in his food. I think all my kiddos would love these but was just wondering if it needed to be something that was served right away to avoid food texture issues.
Laura Fuentes says
Susan, great question. If you toast it in the morning, allow it to cool down to room temperature prior to packing it in the lunchbox, it should remain crispy. It will get soggy not from the sauce but from the steam that gets trapped in the container if you don’t let it cool down completely. I think it’s worth trying once 🙂
Susan says
Thank you Laura! I’ve got these on my menu plan for next week so that we can do a trial run. All three of the kiddos looked at the pictures and are excited about trying them!
Laura Fuentes says
So glad this was a success!
Matt Robinson says
These look like so much fun to make, and so yummy! Can’t wait to try these with the boys soon:)
Laura Fuentes says
Thanks Matt! this makes for a quick and easy dinner for sure.