
These homemade marshmallows with no corn syrup have the same texture, taste, and perform like the classic marshmallow you love but are made with wholesome ingredients like honey, powdered gelatin, and vanilla extract.
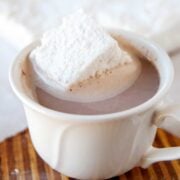
This recipe yields marshmallows that are bouncy, light, and perfect for topping over a cup of hot cocoa or toasted and sandwiched in between graham crackers and chocolate!

Jump to:
Ingredients
Here’s a list of everything you need for these fluffy marshmallows:
- water: to dissolve the gelatin.
- powdered gelatin: gelatin is an essential ingredient for marshmallows. I like using this brand.
- honey: the lighter the color, the better, so the marshmallows won’t be an odd shade of yellow. You can also use maple syrup.
- vanilla extract and salt: for flavor.
- arrowroot starch: for dusting the finished marshmallows and it prevents them from sticking together. If you aren’t doing paleo, you can use powdered sugar for dusting as well.
I don't use raw honey for this because it's a lot more expensive and when you boil the honey the "raw" ness goes away. So for me, it's not worth the extra expense.
Want more delicious treats and desserts that are made with better ingredients? Check out my Clean Treats Cookbook, it has everything from chocolate cake to no-bake recipes, ice cream, and an incredible Blueberry Oat Bread.
Clean Treats Cookbook
Healthy and wholesome dessert recipes you'll want to eat made with clean ingredients you already have on hand.
Grab your copy today!

Does it Matter Which Gelatin I Use?
Gelatin is what makes marshmallows set and hold together. I like to use pure beef gelatin that I can measure out myself but if the packets of Knox gelatin are what’s easily available, use those.
Knox gelatin is sold in bulk and in packet form. The packets are easy to find at the grocery store. Each packet of Knox gelatin has about a tablespoon, but to be safe, I would measure out 3 tablespoons.
Is this Marshmallow Recipe Paleo?
These marshmallows are a paleo-approved treat. They are made with honey instead of corn syrup and there’s no cornstarch in sight.
If you’re not eating paleo but came to this recipe for its corn-free ingredients, you can substitute the arrowroot starch with powdered sugar.

How to Make Marshmallows without Corn Syrup
Before we start you will need a square baking pan, parchment paper, a stand mixer, a saucepan, and a candy thermometer to make this recipe go smooth.
There are quite a few steps to make homemade marshmallows, but overall the recipe is easy, and below I provide step-by-step directions so your batch will turn out perfectly.

- Prep
Grease an 8×8 inch pan and line it with parchment paper in both directions, leaving about an inch as handles to lift out the marshmallows.
Dust the parchment paper with arrowroot starch. - Soften the gelatin
In the bowl of a stand mixer, combine the gelatin with ½ cup of water. - Make the syrup
Combine the remaining ½ cup with honey, vanilla, and salt in a medium saucepan over medium-high heat. Bring the mixture to a boil. - Take its temperature
Once boiling, place a candy thermometer in the saucepan and continue to boil the mixture until it reaches 240F (the softball stage). Immediately remove the saucepan from the heat. - Time to make marshmallow cream
Insert the whisk attachment to the mixer and slowly whisk the softened gelatin as you pour in the honey mixture. Turn the mixer to high and continue beating until the honey and gelatin become thick like marshmallow cream. - Grab the parchment-lined baking dish
Turn off the mixer and pour the marshmallow cream into the parchment-lined pan. Smooth the top and add another light dusting of arrowroot starch over the marshmallows. - Smooth it out
Cut an 8-inch square piece of parchment paper and place it over the marshmallows, gently pressing it over the top to smooth them out. - Be patient
Allow the marshmallows to "set" for 4-6 hours. They’re ready to slice once the texture is bouncy. - Let’s see how they turned out
Lift the big marshmallow square out of the pan and onto the counter. Using a sharp knife slice it into 16 squares.
These marshmallows should be light, spongy, bouncy and a delicious treat to enjoy by themselves or topped over something chocolatey and delicious.

Can I make Homemade Marshmallows with a Stand Mixer?
You can make this homemade marshmallow using a stand mixer but you will need to make sure to use a large, deep bowl to combine the gelatin and honey mixture.
It will also take about 15 minutes to make the cream and I recommend having someone pour in the hot honey mixture while you hold the bowl and whip the ingredients with the hand mixer.
Big Marshmallows
If you want colossal marshmallows like the ones found in the grocery store just slice them 6 x 6 for 12 squares or 4 x 4 for 8 large squares. While they may not be round, these homemade marshmallows are much tastier and since we’re making them, we get to decide how big we want them.

Tips for This Easy Marshmallow Recipe
Here are a few helpful tips to keep in mind as you make this recipe for perfect, bouncy marshmallows:
Make sure the honey mixture is 240F
You don’t want it to be any hotter or cooler when you pour it into the gelatin.
Don’t overmix
Once the honey and gelatin mixtures look like marshmallow cream, stop mixing.
How to Store Marshmallows
Homemade marshmallows are best consumed within 3 days. Keep them in an airtight container at room temperature and don’t refrigerate.
How to Serve Homemade Marshmallows
Homemade marshmallows can be used in all the ways we use store-bought marshmallows. The flavor and melting quality is a serious upgrade.
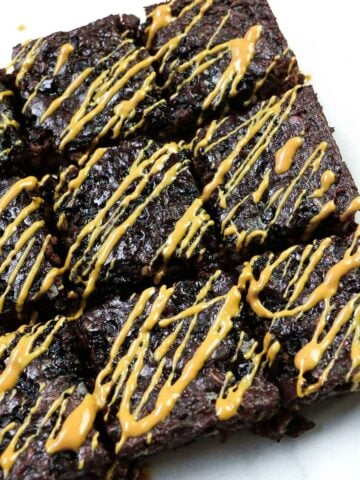
You can toast them over a fire, make s’mores and rice crispy treats, or fold them into brownie batter and cookie dough.
If you do want to use them for cookies and brownies, I recommend cubing them into small pieces so it’s easier to fold into the dough.
Homemade Marshmallows – No Corn Syrup Recipe
Ingredients
- 1 cup filtered water, divided
- 3 tablespoons powdered gelatin*
- 1 cup light-colored honey*
- 1 teaspoon vanilla extract
- ¼ teaspoon salt
- Arrowroot starch to coat the outsides of the marshmallows*
Instructions
- Grease an 8×8 inch pan and line it with parchment paper in both directions, leaving about an inch as handles to lift out the marshmallows.
- Dust the parchment paper with arrowroot starch.
- In the bowl of a stand mixer, combine the gelatin with ½ cup of water.
- Combine the remaining ½ cup of water with honey, vanilla, and salt in a medium saucepan over medium-high heat. Bring the mixture to a boil.
- Once boiling, place a candy thermometer in the saucepan and continue to boil the mixture until it reaches 240F (the softball stage). Immediately remove the saucepan from the heat.
- Insert the whisk attachment in the mixer and turn on medium speed while you pour the honey mixture into the gelatin.
- Turn the mixer to high and continue beating until the honey and gelatin become thick like marshmallow cream.
- Turn off the mixer and pour the marshmallow cream into the parchment-lined pan. Smooth the top and add another light dusting of arrowroot starch over the marshmallows.
- Cut a piece of an 8-inch square of parchment paper and place it over the marshmallows, gently pressing it over the top to smooth them out.
- Allow the marshmallows to "set" for 4-6 hours. They’re ready to slice once the texture is bouncy.
- Lift the big marshmallow square out of the pan and onto the counter. Using a sharp knife slice it into 16 squares.
Notes
- Plain Knox gelatin will work too.
- I don’t use raw honey for this because it’s a lot more expensive and when you boil the honey the “raw” ness goes away. So for me, it’s not worth the extra expense.
- If you are not on a GAPS diet, Paleo lifestyle, or don’t have arrowroot, you can use conventional powdered sugar for dusting.
- storage note: If you cover these the moisture will remain in the marshmallow and they won’t completely dry out. don’t cover them with plastic wrap. I leave mine out on the counter, uncovered, until they are gone.
- how to package these to “gift”: I recommend lining a small box with parchment paper and placing marshmallows in the box, not in a bag.
The recommendations below may include affiliate links.


Lori says
Just came across this recipe and marshmallows turned out perfectly!
The honey flavor was a bit over -powering though. Wondering if you have ever tried to make them with a coconut sugar or maple syrup? Or perhaps just less honey?
Thanks so much.
Ashley Kennedy says
I’ve made them with coconut sugar and they are great!!
Ashley Kennedy says
I’ve made them with coconut sugar they were great!
Ashley Kennedy says
I was so excited to find this recipe. I did burn the first batch of honey but the second time was a success! However, I’m not a huge fan of honey. I do love coconut sugar and make my own simple syrup. So I decided to give the marshmallows a try with my coconut sugar syrup. They have a light brown color and a bit more of a brown sugar flavor but they are delicious! Melted some down and made a batch of rice crispies with gluten free rice cereal topped with cacao nibs. Huge hit!
Ann says
Do you know if this would work to frost cupcakes? I’m working on a s’mores cupcake for my son’s birthday so this would be perfect on a chocolate cupcake. Should I pipe directly onto the cupcake before cooling, or cool them and then melt down like a normal marshmallow and try to make a fluff out of it??
I did make these already as directed and they came out wonderful. I was planning to try the frosting but somehow I ran out of marshmallows before I got round to it. 🙂 I’m hoping someone else has tried this.
Laura Fuentes says
Ann, I haven’t tried this to frost cupcakes -yet! I imagine using a knife to spread it over the cupcake tops (or you could pipe it) when it’s warm. they will solidify overtime, it’s not fluff. Here is my fluff recipe. Enjoy!
Person says
Hi
Thank you for including video with the recipe!! VERY VERY helpful :).
Question – do u know what difference will be if use dark vs light honey? I have a lot of dark honey in the house currently….
Thanks!!! 🙂
Heather says
Hi!
This looks like an excellent recipe for those of us with corn-allergies! I’m curious, has anyone tried freezing these?
-Heather
Laura Fuentes says
I have not tried freezing them. If you do, please let me know how they hold up. Enjoy!
Sarah says
I have frozen these and it works if you are careful. I placed them on parchment paper cut to the size of a Ziploc freezer bag. I put the marshmallows on the paper, put another sheet on top to add a 2nd layer, then put a piece on top of the whole pile. Once they were in the bag, I made sure to press all the air out of the bag and then put it directly in the freezer. They were great a couple of months later when my daughter needed marshmallows for camp again.
The 1st time I made honey marshmallows (not this recipe but a similar one), I didn’t know not to close them in a container. I went away for a week and left the remaining ones in a closed container on the counter at home. When I got home I planned to ‘melt’ the leftovers to make rice krispie squares. Alas, they were green – gone moldy while I was on vacation due to absorbing all the moisture in the air/container. Oops!