This post may contain affiliate links. Read our disclosure policy here.
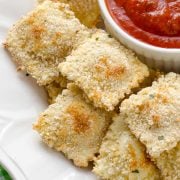
Try these toasted ravioli for a delicious appetizer and healthier alternative to the original fried recipe.
This recipe was inspired by a dish from a local restaurant that my kids love. The ravioli are breaded, fried, and served with marinara. While they are crisp and delicious, I’m not a fan of frying foods at home, so I decided to bake them instead. The results were a HUGE success!

Jump to:
Cripsy Toasted Ravioli
These toasted ravioli are breaded with Panko, seasonings, and Parmesan cheese then baked to golden perfection. The oven gives the coating that perfect crunch when you bite in and makes the cheesy centers warm and soft.
No matter if you serve them as an appetizer or in the lunchbox, they’ll disappear in no time.
Ingredients
Here’s everything you need to make crispy breaded ravioli in the oven:
- Breadcrumbs: combine panko and plain breadcrumbs to make a super crispy breading.
- Salt: for seasoning.
- Italian seasoning: makes the breading even more tasty!
- Grated Parmesan cheese: just when you thought this recipe couldn’t get any better… it gets cheesy!
- Eggs: to bind the breadcrumbs to the ravioli.
- Frozen ravioli: the ones with your favorite filling. You can also use fresh ravioli.
- Olive oil spray: to grease the baking sheet.
You’ll find the ingredient amounts in the recipe card below.
The Best Ravioli
The best ravioli to use, whether it’s shaped squared or round, is flat and stuffed with a variety of fillings such as:
- cheese
- spinach & cheese
- mushrooms
- beef
- Italian sausage
How to Bake Toasted Ravioli
Making toasted ravioli in the oven is much easier than frying with less to clean up, and the results are just as crispy and delicious. Here’s what to do:
- Get the oven hot
Preheat the oven to 425F and line a large baking sheet with parchment paper. - Make the breading
In a shallow bowl or pie dish, combine the breadcrumbs, salt, Italian seasoning, and Parmesan cheese. - Crack an egg (or three!)
In a large bowl, whisk the eggs until smooth and set aside. - Cook the ravioli
In a medium saucepan, cook the ravioli for 3 minutes in boiling water. Drain and allow them to cool for 5-10 minutes. - Give them a toss
Working 4 at a time, toss the ravioli with the eggs then transfer to the Parmesan and breadcrumb mixture, coating both sides. Place on the lined baking sheet. - Bake to perfection
Give the breaded ravioli a spritz with olive oil or baking spray then bake for 15 minutes or until toasted and golden brown. Remove from the oven and allow to cool slightly. - Time to dip!
Grab your dipping sauce of choice and go to town.

Can I Prep these Ahead?
These ravioli can be prepped and frozen ahead of time for a quick appetizer or side dish. Here’s how to make a stash for your freezer:
- Cook the ravioli and allow them to cool.
- Toss the ravioli with the breading and add them to a parchment-lined baking sheet.
- Freeze for 1 hour and transfer to a freezer bag.
- When ready to bake, follow the recipe directions above, adding 3 to 4 minutes to baking.
Using Frozen Ravioli
Yes, you can use frozen ravioli for this recipe, not to be confused with tortellini. One advantage to frozen ravioli is they are already pre-cooked, so they don’t need as long to boil and are softer in the center. In the recipe below, you’ll find the directions.
Using Fresh Ravioli
You can also use fresh ravioli for this recipe, not to be confused with tortellini. You just need to add 2 minutes to your boiling time until the ravioli has an al dente texture. In the recipe below, you’ll find the directions.
Gluten-Free Toasted Ravioli
Need to make these gluten-free? We can make that happen. You’ll need gluten-free ravioli, fresh or frozen, as well as gluten-free Panko and breadcrumbs.
I find that making your own gluten-free Panko breadcrumbs is easier than trying to find them at the store.
All you need is gluten-free rice cereal and a couple of whirls in the blender or food processor. It creates the perfect, panko-like texture and gives breaded foods that crispy texture we love without gluten.

How to Serve Toasted Ravioli
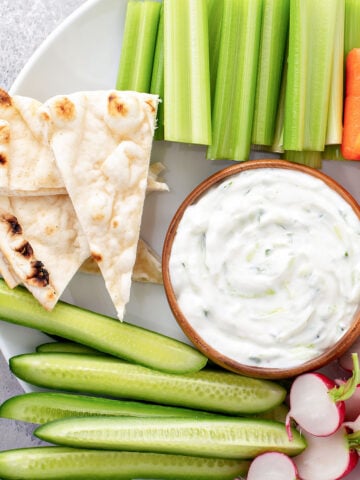
Now that we have crispy baked ravioli, it’s time to get a little saucy. Here are a few dipping sauces that would go heavenly with this recipe:
You can also forgo the sauce and serve these plain. The crispy Parmesan coating gives these ravioli plenty of flavor.
And if you want to serve these in a way that makes your kids day, pack them for lunch! I like to do this by baking them the night before, refrigerating, and reheating in the toaster oven the next morning. Pack them in a lunch container with dipping sauce, and lunch is in the bag.
Oven-Toasted Ravioli Recipe
Ingredients
- 1 ½ cups plain Panko breadcrumbs
- ¾ cup plain bread crumbs
- ¼ teaspoon salt
- 2 teaspoon Italian seasoning
- 1 tablespoon grated Parmesan cheese
- 3 eggs
- 24 frozen* cheese ravioli
- Olive oil spray
Instructions
- Preheat the oven to 425F and line a large baking sheet with parchment paper.
- Combine the breadcrumbs, salt, Italian seasoning, and Parmesan cheese in a shallow bowl or pie dish.
- In a large bowl, whisk the eggs. Set aside.
- In a medium saucepan, bring water to a boil, add the ravioli and cook for 3 minutes. Drain and allow them to cool for 5-10 minutes.
- Working in batches of 4 ravioli, dip them into the whisked eggs, then toss them in the breading, making sure to coat both sides.
- Place the breaded ravioli in an even layer onto the lined baking sheet.
- Repeat the breading process with the remaining ravioli.
- Spray lightly with olive oil or baking spray and bake for 15 minutes or until golden and crisp to the touch.
- Remove them from the oven and allow them to cool for 3 minutes before serving with your choice of dipping sauce.
Notes


Nutrition


Judy says
Served these toasted raviolis as an after school snack and it was a huge hit with my whole family.
Susan says
These were perfectly crispy
Charlie says
I’ve made this recipe a dozen times because my little girls love it and it’s easy to do. Tonight I started to prep and realized I was out of eggs! I used avocado oil instead and it still turned out great. Love this recipe so much
Laura Fuentes says
Brilliant! I’m so glad you saved the day.
Dawn says
If you want to make these ahead do you cook them first still or can you bread them frozen and put bake into freezer until ready to bake? Also could they be baked in an air fryer? Thinking these would be nice to have ready for when my 15 yr
Old comes home but I’ll have to double the recipe if I want them to last a few days.
Laura Fuentes says
An Air fryer would be great for this recipe! I would bread them and then freeze them for later cooking. And yes, definitely double the recipe with a teen!
Martha from Inside the Yellow Home says
I just wanted to pop on and let you know that I’m loving this recipe. I have a seriously picky eater on my hands and no time to make lunches in the morning before school. I’ll be trying your recipe soon and wanted to let you know that I’ve shared it over on my blog too. 🙂
Laura Fuentes says
I’m so glad it was enjoyed!
Kristy says
Laura – thanks a million for sharing this recipe. I had never seen anything like this but I made them (gluten free) the other day and they were absolutely delicious! My 6- year- old with celiac ate 10 of them! Now that’s a win! I’ll be making these on a regular basis
Kristy Carter
Laura Fuentes says
I’m so glad it was a success with your 6-year old! and everyone else too of course.
phyllis says
Every week my friend/neighbor and I get together for appetizers and wine — always looking for something special to serve and this is perfect: baked not fried!!! And of course this goes very well with our wine – thank you so much for this recipe.
Laura Fuentes says
Enjoy the time Phyllis!
Kristen says
Can I ask what containers you used in your photos above?!
Laura Fuentes says
Absolutely. Those are EasyLunchboxes. You can find them on Amazon here.
Kiran says
Hiii Laura great recipe . Was just wondering if this could be made with homemade ravioli? If yes then a doubt do I cook them in water first then follow the recipe??
Laura Fuentes says
Hi Kiran, I have not made this with homemade ravioli as I fear that they are a bit too delicate. sorry! If you try it, will you let me know how it works?
Kiran says
Sure will do Laura!
Shonna molle says
Are they good cold or at room temp. Thinking of my kids for lunch boxes.
Laura Fuentes says
My kids eat these at room temperature in their lunchbox. I hope this helps! 😉
Randa says
Would frozen tortellini work?
Laura Fuentes says
yes, thaw them out first and follow the recipe. Enjoy!
Zilel says
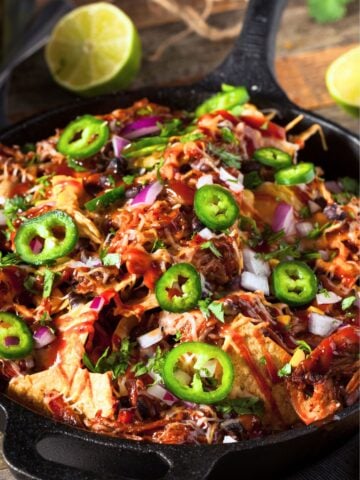
Not really ravioli. But nice snack to have instead of nachos anyways.
Laura Fuentes says
You use cooked ravioli to make this recipe.
Aman says
HI…
These look delicious but my only concern is that we don’t eat eggs. Is there anything else I could use instead of eggs?
Laura Fuentes says
Aman, I haven’t tried this recipe with anything else other than eggs. You’ll need to find an alternative to bind the crumbs to the raviolis.
Brenda says
You could use Italian dressing.
Tanya says
Our family enjoyed this recipe! I used a box of frozen ravioli that said it had 48, so I doubled the bread crumb mixture and it was way too much. Next time I’ll try to remember not to double the breading.
Jessica says
We made these the other week and they were so good! Im from St. Louis, the home of toasted ravioli so I was thrilled to see another way to do that than frying. However, I will say that the coating did not stay on quite as easily as the recipe would make you believe. It might be easier other more traditional ways of battering with some flour and then the egg to make it a bit more sticky and then the seasoned bread crumbs. We used Penzey’s Pizza Seasoning in the crumbs which was excellent.
Lily says
Made these for dinner tonight. My kids really liked them. Ours were crunchy on the outside and the pasta got a little chewy. We all liked it! Great idea!
Anne says
These were gobbled up by my 4 year old and 18 month old. I did one full cookie sheet by dipping them in the egg but by the second cookie sheet, my bread/cheese mixture was clumpy so I laid them out, brushed with egg and used my sifter to sprinkle the mixture on. We liked the crunchy texture of the first batch much better but they were still great.
Laura Fuentes says
Thrilled everyone loved them!
Meggan | Culinary Hill says
These are so great, what a fun lunchbox idea! Or Friday night in idea…. 🙂
Laura Fuentes says
Yes for sure! Let me know how you enjoy them Meggan.
Denise says
Happy Sunday Laura. Nice to have you met you personally last night. Wanted to stop by and show some love. Have a great week!
Laura Fuentes says
Thank you Denise! Thanks so much for stopping by and it was great to meet you last night as well!
Sam@Baking Made Easy says
Amazing!
Matt Robinson says
Love that you baked these! And that breading looks soooo good!
Laura Fuentes says
Thanks Matt! they are super crunchy and not at all greasy.
KarmaFree Cooking says
To make these gluten-free I think you first need to start with gluten-free frozen raviolis. If the ravioli to start with are made with regular semolina or even whole-wheat flour, just dusting with cornmeal or other gluten-free breadcrumb will not make these gluten-free.
Laura Fuentes says
If you read the post, I found gluten free raviolis made with rice flour at whole foods. Therefore, they are 100% gluten free. I just edited the recipe notes for people who don’t read it. thanks for bringing it up to my attention.
KarmaFree Cooking says
You’re right!!! I only read the recipe and not the whole post. My bad for commenting without reading it all thru. I was just eager to learn about how to make these gluten-free. At least it brought out the importance of including in the recipe that you need to start with the right product. You have a wonderful blog…
Laura Fuentes says
No worries. It was a great observation and adding it to the recipe is a no brainer. We wouldn’t want people making these for someone else’s child and just switch the breading!
Nicolle says
I love quick, easy, and inexpensive meals for the whole family. These were definitely a hit! Served with marinara & alfredo sauce to dip. Will definitely be making these again soon! Thanks for sharing.