
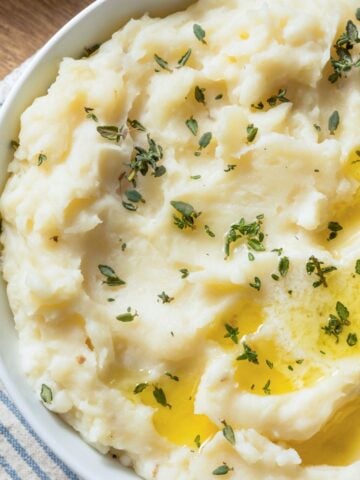
While regular yeast rolls have their place at holiday gatherings, these Easy Muffin Tin Popovers are on a whole new level. They are crispy on the outside with soft, airy centers perfect for sopping up the last bit of gravy.
Once you serve these bad boys, it’s over. You’ll be expected to make them by the dozen every year, but thankfully for you and me, the recipe is a cinch to make and requires no yeast or kneading.

What is a Popover?
If you've never tried popovers, you are in for a treat. They are a light roll made from egg batter that "pops over" the muffin tin, giving the top a blossomed appearance. Inside their crispy, golden-brown exteriors, the centers are hollow and pull-apart soft with a buttery flavor.
If that description isn't enough to convince you of their superiority to yeast rolls, bake them quickly and easily, and see how these items are the first to disappear! When served hot with butter, they melt in your mouth; and are perfect for soaking up gravy or cranberry sauce.
Ingredients
It’s hard to imagine 5 simple ingredients could create something so delicious and wonderful, but good thing they do. Here’s everything needed to make them:
- Melted butter: unsalted is best.
- Eggs: at room temperature.
- Milk: regular whole milk works best.
- All-purpose flour: for GF popovers, Bob's 1:1 Gluten-Free Flour yields good results.
- Salt: to enhance the flavor.

How to Make Popovers in a Muffin Pan
Typically, popovers are made in a special pan with deeper cups that allow them to "popover," hence the name. However, we’re going to use a regular muffin pan to make this recipe. There’s no need to buy a special pan that you will use at most; twice a year.
And to simplify the process, the batter is whipped up in a blender. I’ve found it to be easier and yield better results than whisking. Here’s how to make these easy popovers:
- Prep
Preheat the oven to 400F, grease a 12 muffin cup tin with tablespoons butter, and place it in the oven to warm for 5 minutes. - Blend
Meanwhile, add the eggs to a blender and blend at medium-high speed. Add the milk and blend until smooth. - Blend some more
Add the flour, salt, and remaining butter to the egg-milk mixture, and blend until smooth. - Pour the batter
Carefully remove the warmed muffin pan and pour the batter into the muffin cups filling them only ¾th of the way. *Keep in mind these are going to rise and expand. - Watch them rise
Baked for 35 minutes or until golden brown. Remove from the oven and serve.
Once you catch a glimpse of these popovers rising to their golden brown glory in the oven, you’ll be hooked.
Since we don't want any fights breaking out over who gets the last popover, it’s good practice to double the recipe. All you need is two muffin pans, and you're good to go!
Watch how these are made in the quick recipe video below.
The Key to Perfect Popovers with Extra Rise
The perfect popover is super light and has a crispy exterior. Below are simple tips to achieve those desired results batch after batch:
Room temperature ingredients
Starting with room temperature eggs and milk allows the ingredients to emulsify into a smooth, thin batter so that the popovers can rise easily.
Allow the batter to rest
At least 15 minutes gives time for the gluten to relax, creating a more flexible batter. Flexible batter = tall and fluffy popovers.
Don’t disturb
Once the popovers are in the oven, don’t open! This could cause them to deflate.
Let the steam escape
Once you remove them from the oven, remove them from the pan immediately. Otherwise, they’ll continue to cook and lose that crispy exterior.

More Tips for Perfect, Easy Popovers
So know that we have the basics down, all that’s left is some yummy variations and serving tips which I share with you below.
Stir in seasonings
Add 1 ½ teaspoons of your favorite herb or seasoning blend. I love Italian and Herbs de Provence.
Add cheese
Stir in 1 cup shredded Cheddar, Parmesan, or Gouda cheese into the blended batter. It brings these popovers to a heavenly level.
Make them sweet and savory
Sprinkle the tops with cinnamon and sugar, or serve with your favorite jam and butter.
Serve them fresh
As with homemade biscuits and bread, popovers are best served straight from the oven. Of course, you can reheat them in a 350F oven for 5 minutes or until warm, but nothing beats that first fresh-out of the oven experience.
Can you make the batter ahead?
You can make the batter beforehand, but I recommend no more than an hour.
Since we don’t want any fights breaking out over who gets the last popover, this recipe is easily doubled. All you need is two muffin pans and you’re good to go!
Easy Popover Recipe

Watch how it’s made:
Ingredients
- 6 tablespoons melted butter, divided
- 3 eggs
- 1 ½ cups milk, warmed 30 seconds in the microwave
- 1 ½ cups all-purpose flour
- 1 teaspoon salt
Instructions
- Preheat the oven to 400F and grease 12 muffin cups with 2 tablespoons butter. Warm the muffin pan in the oven for 5 minutes.
- Meanwhile, add the eggs to a blender and blend at medium-high speed. Add the milk and blend until combined.
- Add the flour, salt, and remaining melted butter, and blend until smooth.
- Carefully remove the warmed muffin pan and pour the batter into the cups, filling ¾th of the way.
- Bake for 35 minutes or until golden. Remove from oven and serve hot.
The recommendations below may include affiliate links.


Pat says
Can you bake these at 425 F, the same temp as the pork loin?
Laura Fuentes says
I have not tested this at 425. My intuition says that is too hot, which would make them rise too quickly, sink quickly too.
Wessel Germeshuizen says
They remind me of Yorkshire pudding. They are delicious with honey too (I have a sweet tooth). I used self-raising flour since I am unsure if all-purpose flour is the same as what we South Africans know as cake flour, which has no raising agent. Next time I will be bolder and add some herbs and spices.
Linda says
Can I use an egg substitute?
Laura Fuentes says
Unfortunately, this recipe relies on eggs for the structure. I do not recommend using an egg substitute.
Marion says
All I can say is WOW! I JUST read over this & THESE will be made today to see how I do. I am one of those who BUYS rolls as I am afraid of rolled dough items. THIS, THIS, I can do. My husband loves any kind of bread etc. with dinner & I find myself making the easiest of breads or plop & drop (LOL). For holidays though I DO tend to buy higher priced rolls. Not sure what I’m having for dinner YET but these popovers will be on the menu. I’ll write later with my results.
Laura Fuentes says
I can’t wait for you to enjoy these!