
You can make these using a chocolate bar-shaped mold or your favorite silicone molds. Follow the easy steps below for a terrific treat!

What is a Chunky Bar?
The original Chunky Bar was a chocolate bar made by Nestle with an iconic square pyramid-like shape. It had a sweet and salty combination of raisins and roasted peanuts and was available in milk chocolate and dark chocolate.
However, the dark chocolate has been discontinued, and the milk chocolate can be hard to find. Luckily, with this recipe, you can now make your own at home!
Chunky Bar Ingredients:
Grab these 3 simple ingredients to make chunky bars at home.
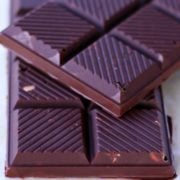
- Chocolate: use chocolate chips or shave off pieces from a chocolate bar. You get to choose between semi-sweet or dark!
- Raisins: a classic ingredient that adds sweetness to these bars.
- Peanuts: roasted unsalted work best, simply coarsely chop them.
You’ll find the ingredient amounts in the recipe card below.

How to make these chocolate chunky bars
The steps to make these chocolate bars at home are simple.
- Prep:
Set up a double broiler by filling a small sauce pot with about 3 inches of water. Place a heat-resistant bowl on top. Place the chocolate molds on a baking sheet or a small tray. I recommend using one that will fit inside your fridge. Distribute the chopped peanuts and raisins inside the molds, making sure there’s even distribution in the bars. - Melt the chocolate:
Place the chocolate on top of the double broiler and melt it while gently stirring it with a spatula. Once melted, turn off the heat. - Fill:
Carefully pour the melted chocolate inside the prepared molds. Spread the chocolate with a silicone spatula or frosting spatula as an even layer on top. - Chill:
Transfer the tray with the chocolate molds to the fridge and let them harden for 4 hours or overnight. Remove from the fridge and enjoy. - Cut & Enjoy:
Carefully remove the chocolate bars from the mold by flipping them over onto a cutting board. Cut into pieces and enjoy! - Store:
Store chocolate bars in an airtight container in the pantry or refrigerator for up to a month and in the freezer for up to 3 months.


Storage of homemade chocolate bars
Store chocolate bars in an airtight container in the pantry or refrigerator for up to a month and in the freezer for up to 3 months.
Homemade Chunky Bars
Ingredients
- 2 cups chocolate chips or chunks, semi-sweet or dark
- ½ cup raisins
- ½ cup roasted unsalted peanuts, chopped
Instructions
Prep:
- Set up a double broiler by filling a small sauce pot with about 3 inches of water. Place a heat-resistant bowl on top.
- Place the chocolate molds on a baking sheet or a small tray. I recommend using one that will fit inside your fridge.
- Distribute the chopped peanuts and raisins inside the molds, making sure there's even distrubution in the bars.
Melt the chocolate:
- Slowly melt the chocolate chips while stirring with a spatula in the double broiler. Once melted, turn off the heat.
Fill:
- Carefully pour the melted chocolate inside the prepared molds. Spread the chocolate with a silicone spatula or frosting spatula as an even layer on top.
Chill:
- Transfer the tray with the chocolate molds to the fridge and let them harden for 4 hours or overnight. Remove from the fridge and enjoy.
Cut & Enjoy:
- Carefully remove the chocolate bars from the mold by flipping them over onto a cutting board. Cut into pieces and enjoy!
Store:
- Store chocolate bars in an airtight container in the pantry or refrigerator for up to a month and in the freezer for up to 3 months.
The recommendations below may include affiliate links.



Jane Hollander says
Do you add salt to this recipe ?
When do you put both sides of the mold together?
Chunky chocolate bars were my childhood favorite !
Thanks for all your hard work..
Looking forward chocolate making..
Laura Fuentes says
Jane, I don’t add salt and the mold is only one sided. I made the chunky bars exactly as you see them.
Blessed Little Family says
We can eat nuts but I’m not crazy about them raw. Do you think mixing in some peanut butter would work? Or just omit and add something else- maybe rice crispies as a previous commenter mentioned? Or oats? Thanks! This looks super easy! Btw, we are dairy free and egg free. Enjoy Life chocolate chips work great in recipes like these. 🙂 My world changed for the better when I found this brand. Lol. 🙂
Laura Fuentes says
Hi! You can absolutely add rice krispies. Enjoy life will melt well too. So yes, you can make these with their chocolate chips! I haven’t tried adding peanut butter… and I am not sure it will harden enough. omit the nuts 🙂
Kelly @ The Nourishing Home says
So glad you had fun at Blissdom! I am hoping we can get together sometime soon! I would love to hang out with you! And these little bars are SO simple, yet beautiful and brilliant! I can’t wait to give them a try – maybe an almond, walnut or pecan version too!
Laura Fuentes says
yum Kelly!
virginia says
since we cant use peanuts in our house i think i want to do this wish crisp rice cereal and make it like a chocolate raisin crunch bar
Laura Fuentes says
i was saving that for another post… but i love putting rice krispies and making crunch bars! 🙂
Michelle | Creative Food says
These look delicious!!