
Learn how to make no carb cloud bread with the easy recipe below, plus a simple video showing you how this zero carb bread is made!

No Carb Bread A.K.A Cloud Bread
This recipe for cloud bread also referred to it as No-Carb Cloud Bread or Keto bread is the perfect solution to your bread-free woes. I mean, sometimes you just want a low-carb sandwich! And making it is so easy you are not going to believe it.
Can I also add that this Cloud Bread recipe is made with only three ingredients? Eggs, cream cheese, and cream of tartar. So technically, not only are these no-carb and easy to make, but they are also cheaper than a loaf of bread!
What Does Cloud Bread Taste Like?
Personally, I think that cloud bread tastes quite neutral which is great to use with sweet spreads or to make a savory sandwich. It’s definitely different than traditional bread, with a light creamy-like flavor from the cream cheese although most people find it a bit eggy.
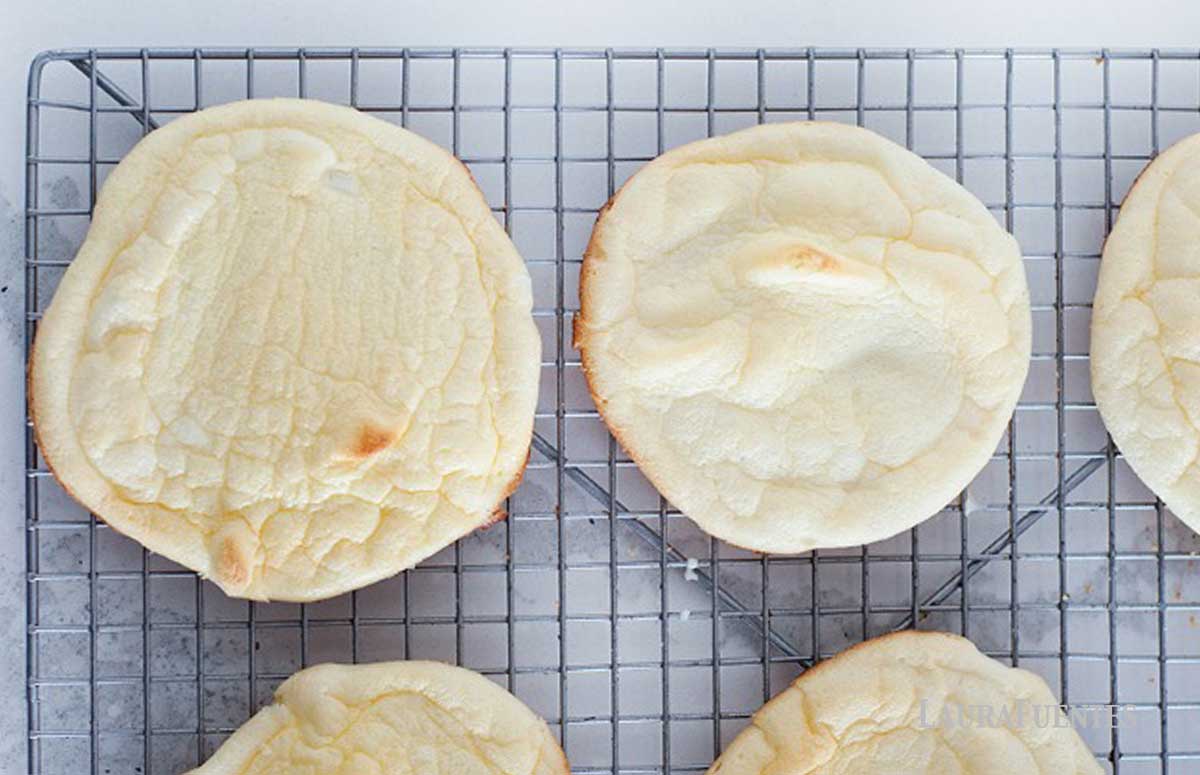
Ingredients
The ingredients in Cloud Bread are quite basic but they need to be followed to a T since this recipe is not friendly to making any substitutions or ingredient swaps. You’ll need:
- Eggs: you’ll separate the white from the yolks.
- Cream cheese: regular, not light, at room temperature. Do not microwave it! It will give it an inconsistent texture. Just leave it on the counter for 15 minutes to soften.
- Liquid stevia: optional to cut out the eggy taste.
- Cream of tartar: a must-have ingredient that holds the stiff peaks of the egg whites.
Can You Use Cottage cheese for cloud bread?
Using full-fat cottage cheese, blended to make it smooth, will yield a runner batter texture and the bread rounds will turn out flat and not as fluffy as when using cream cheese.
How to Make Cloud Bread
Making cloud bread is simple and while there’s a video in the recipe card, here are some additional tips in each step that ensure success:
- Prep the oven
Preheat the oven to 300F and make sure the top rack is in the middle position of the oven and the second one right below it. You can bake two at a time or one after the other. - Prep the ingredients
Separate the egg whites from the yolks. Remove the cream cheese from the fridge for 10 to 15 minutes until it’s at room temperature. Don’t use the microwave to speed up the process; it changes the texture. - Whisk the egg yolks
With a whisk or a hand mixer, combine the egg yolks, softened cream cheese, and stevia (if using) until you have a smooth, creamy liquid. - Whisk the egg whites
Whisking the egg whites with cream of tartar until stiff peaks form is KEY to get fluffy cloud bread. You get them by whisking on medium speed and then to high speed for about 5 minutes. - Combine
Fold the egg yolk mixture into the egg whites in batches until the batter is combined. Use a rubber spatula and fold gently: the batter should retain its light and airy texture. - Scoop the batter
You want 4-inch round circles that are about ¾-inch thick. - Bake
Bake for 25 to 30 minutes, swapping the baking sheets halfway through, until the tops are golden. Cooking times will vary based on how thick you spread the cloud bread batter.
I highly recommend watching this video where I show you each step of this recipe, including how the whipped egg whites should look to yield fluffy cloud bread:
Tips for Whipping the Egg Whites
Whipping the egg whites until you get stiff peaks is the trick to perfectly fluffy cloud bread. Check out my tips before you start cooking:
Avoid any trace of fat
Fat keeps the egg whites from whipping, so make sure your bowl is clean, and there are no traces of oil or egg yolks.
Don’t omit the cream of tartar
Cream of tartar stabilizes the egg whites and helps them get together easier and faster, so don’t omit it!
Whisk long enough
Use a hand mixer or stand mixer and whip the egg whites on medium speed and then on high speed for at least 5 minutes. If the egg whites are not firm, keep whisking!
Check peaks are stiff
You’ll know that the egg whites are whisked enough when you lift them with a spoon and they can stay upside down.
How to Store It?
Allow your cloud bread to cool down completely before storing the rounds in a zip bag or airtight container for up to 3 days. Tip: separate each layer with a piece of parchment paper to keep them from sticking.
Can You Freeze Cloud Bread?
While you can freeze eggs, sadly, cloud bread doesn’t freeze well because egg whites change in texture when frozen, so these cloud bread rounds will become soggy and wet.
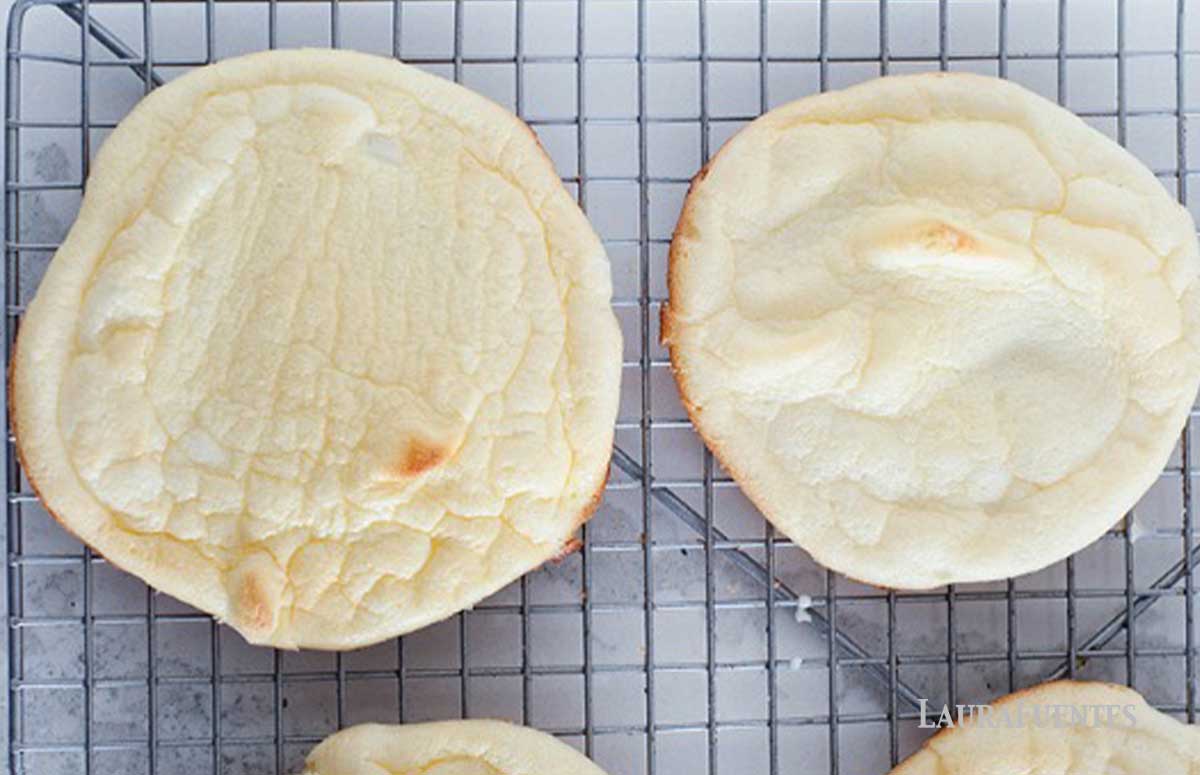
How to Use No Carb Cloud Bread
Make this Cloud Bread recipe once and you’ll soon be making another batch since you can top these rounds with your favorite nut butter or jelly, make a classic sandwich, or eat them plain. I also love to enjoy cloud bread toasted, with avocado egg salad on top, or pizza toppings for a quick and delicious meal. With a few alteration, you can also use this base to make cloud bread bagels. The possibilities are endless!
Cloud Bread Recipe

Watch how it’s made:
Ingredients
- 3 eggs , whites and yolks separated
- 3 tablespoons room temperature full-fat cream cheese
- 2 to 3 drops liquid stevia , optional
- ¼ teaspoon cream of tartar
Instructions
- Preheat the oven to 300F and line two baking sheets with parchment paper or a silicone mat.
- In one bowl, combine the egg yolks with the softened cream cheese and stevia until you have a smooth batter.
- In a large bowl or the bowl of your stand mixer, place egg whites and cream of tartar. Whisk the egg whites on medium speed, moving up to high speed until they are fluffy and stiff peaks have formed.
- With a rubber spatula, gently fold the egg yolk mixture into the egg whites until combined.
- Scoop the mixture onto the baking sheets with a spoon and shape them into ¾-inch thick, 4-inch rounds.
- Bake approximately for 30 minutes, until they are golden. *NOTE that cooking times will vary as this is a very delicate recipe and all ovens vary slightly. Check for doneness without opening the oven door around minute 22.
- Once done, remove from the oven and allow them to cool down completely.
- Transfer them to a zip bag for storage and refrigerate (see notes).
Notes
The recommendations below may include affiliate links.

Wanda Edwards says
Can I use a pack of Splenda instead of stevia?
Laura Fuentes says
yes you can.
Tracy says
Hi. Could I use xylitol? And if so how much would I use?
Laura Fuentes says
I’m sorry, I don’t use xylitol so I don’t know.
Barbara says
Would you know what the calories are on these? My husband is counting calories and I’m a type 2 diabetic, so I know I can eat these, just would like to know about calories. Thanks!
Laura Fuentes says
I dont, but you are welcome to plug the ingredients into many of the websites that offer nutrition facts for free.
Angel says
Making these for the first time… Hope they turn out, it seemed a bit runny. Was wondering if you could make them in a pie pan and cut them up when cooled.?
Laura Fuentes says
Angel, I’ve never made them in a pie pan. If you try them, let me know how they come out.
Amy says
I use this basic recipe without the honey and truvia (replace with 1/2 tsp onion powder or Italian seasoning) and then fold in 1/2 cup of egg white powder or whey protein powder to increase my protein intake. I bake 40-45 minutes at 375degrees in a smaller bread pan (4×7). Let cool completely and then cut! I have also used it in a large pan with sides for pizza crust…bake 15 minutes, put on toppings and then bake again until toppings melt…yum~
Laura Fuentes says
sounds great!
Mama Owl says
Well… I’m not sure what I did wrong. They were not fluffy like the pic. They only took half the time to cook and one totally disintegrated! I’m sure it has something to do with the “folding of the egg whites”. I thought they were quite thin but had to scrape to get the 10th one.
That said… THESE WERE AMAZING!!!!! I ate 2 right away and am eating another 2 this morning!
I was wondering if you had experimented with this… tried making pancakes, rolls, or some sort of “loaf” or “biscuit”.
I will most definitely try these again! “Perfect” or not they are delicious! And satisfy that “need” for bread that I had almost given up on.
THANK YOU! THANK YOU! THANK YOU!
Laura Fuentes says
OY. I’m not sure “what went wrong” but I’m glad you were able to salvage the recipe and make it work! We are working on a grain free meal plan so make sure you re subscribed to our weekly newsletter for more details and grain free recipes.